
Events Dashboard
IN THIS ARTICLE

This is master control for your dated events. You can add & edit events, filter & sort the list of events, and manage multiple events all at once. From here you can also approve user submitted photos!
Most of the information on this page also applies to the Businesses Dashboard, with the exception of date-related features.
Spark location: Events
Event Tools

Add Event
Your starting point for creating new events
Actions
Provides functionality which can be applied to individual events or multiple events simultaneously, depending on which events are check-marked.
* Make listed / Make unlisted - determine whether events are visible in the site navigation
* Make "our pick" / Remove "our pick" - determine whether events are featured with a 'star' icon on the event calendar
* Move To... - allows you to change the event category
* Add To... - allows you to include an event in additional categories
* Deactivate - turns off access to an event pageActive
Determines the site mode(s) shown in the event list.
* Active - will show only events which are currently active
* Inactive - will show only events which are currently inactive
* All - will show all events regardless of their statusFilters
Can be applied individually or combined to focus the event list
* Year - narrows the list to a single event year
* Category - narrows the list to a single event category
* Listed - narrows the list to strictly listed events
* Unlisted - narrows the list to strictly unlisted events
* Member Only Events - narrows the list to strictly member events
(this filter is only available on membership-based sites)More
Provides additional event settings:
* Edit Schedule Views - you might want to try each of these settings to see how they impact the display of your event calendar:
Available Views - allows you to select which types of views are available on your event calendar, as well as the filter orientation. If you're not familiar with the views, go to the event calendar on your website and click each of the icons displayed below the EVENTS title to see the display differences. Most sites leave all the Available Views checked. "
Default View - allows you to select the view which is loaded when a user first arrives at the calendar.
Filter Orientation - this changes the positioning of the icons, selectors, categories and tags. Vertical displays those elements down the left side - Horizontal displays them across the top of the listings.
* Edit Text/Gallery Heading - allows you to post a text intro with a photo gallery or video above your event calendar.
* Add/Edit Custom Field - gives you the option of adding custom data fields to all of your event listings. For example, you could add 'Parking Fee' if this is something charged at your events, yet often changes in cost. It just creates a field to be completed, and if left empty it does not appear.
* Event Templates - opens the event template page where you create & manage starting points for building your event pages.Search
Allows you to quickly find events by keyword. Event names will appear below the search box as you type, and you can arrow-down or hover-over and click when you see what you're looking for. The search is not really seeking words - it's matching character strings. So, your search results might pull up events which seem out of place, yet the characters are matching a word or partial word in the event text.
View Page
Will open a new browser tab to display your website event calendar
Export / Export By Date
These allow you to download your event data for use in a spreadsheet. The 'by date' option includes detail not seen in the basic export.
Import
Allows you to load events in bulk. You'll need to download the xlsx template file - and it's essential that the column headings are not modified. Be sure to read the headings & instructions on each field. The data won't import if it doesn't match the field requirements. We recommend that you check with a Saffire coach before using this tool the first time.
Tips
* you need to use the column headings as-is - you can't change the names nor add other columns or it won't import.
* the columns with boldface names are required: Name, Primary Category, Year, Start Date
* events with multiple dates and/or times can have the same names, yet they need to be entered as separate rows
* be sure the look at column H (type). By default, each event will import as a Quick Event unless you specify that it should be linked to a Full Page
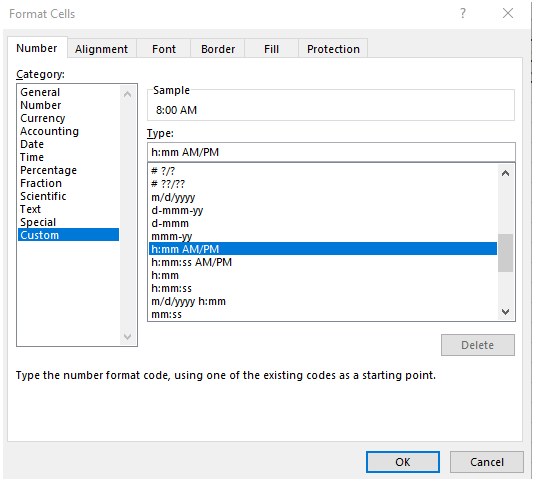
* any 'times' you add in the spreadsheet need to be formatted like this:
Event listings

Checkbox
Used with the Actions, Active and/or Filters tools (described above). Any number of events can be checked at a time.
Star icon
Designates whether an event is flagged as 'Our Pick' in the event listings. Gold means it's picked, gray means it's not.
Listed
Designates whether an event is shown in your site navigation. Green means it's listed, gray means it's not showing.
$ icon
Displays if an event has items for sale.
Hover
* QuickEdit - gives you access to the basic details of an event without leaving the event list
* Edit - opens the full editing window for an event
* View - opens a new browser tab to display the event page on your site
* Copy - duplicates an event and adds 'Copy#' to the title
* Deactivate - makes an event inaccessible on your site
Up/Down triangles
Will sort the list in ascending or descending order according to the column you've chosen
Category & Subcategory
These columns show the current classifications for each event. Subcategories are not necessarily in use on all categories. Both categories and subcategories can be changed at any time.
New
This appears when there are new image submissions for you to review. Note: this is a feature which might not be active on your site. Contact your coach for more information.
Clicking the orange icon will take you to the specific event page where you can review the submission(s) within the Media module. Hop over to this article for complete details on how the feature works.
