Kiosk Enclosure Building Guide
IN THIS ARTICLE
Kiosk Kit Equipment Dimensions
Card Reader Dimensions
Mounting a Monitor
Mounting a Card Reader
Ticket Catch Tray Opening
Things to Keep in Mind
Kiosk Enclosure Examples
RELATED ARTICLES
Kiosks give you the flexibility to offer unattended ticket sales wherever it works best for your event or venue.
We provide the kiosk components as part of your rental, and you’ll be responsible for building your own enclosure. To help you with that, we’ve put together this handy guide with everything you need to get started. Our guide includes equipment specs and dimensions, tips for creating an effective setup, and a photo gallery featuring kiosk enclosures from other Saffire clients for inspiration!
For more information, including setup and troubleshooting, visit our Kiosk Equipment Guide.
Equipment Dimensions
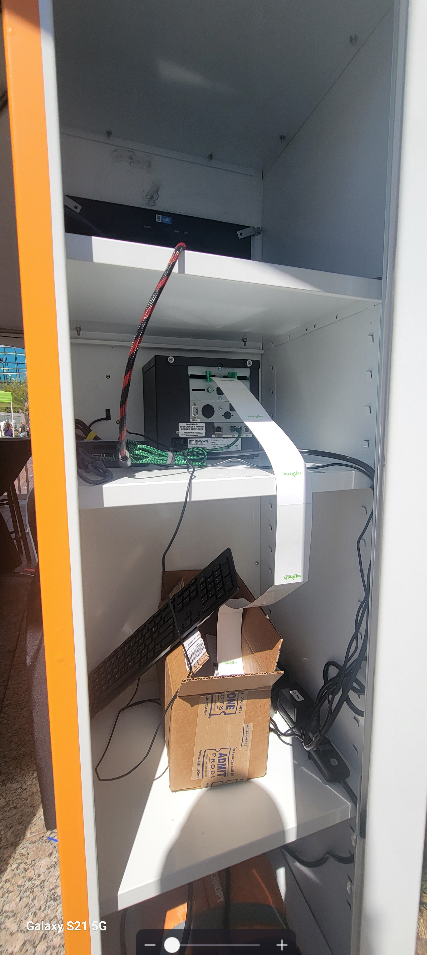
SaffireTix self-service kiosks are shipped to your event as a Kiosk Kit, containing (almost) everything you need. Your credit card reader and ticket stock will be received separately, as they vary based on individual client needs.
The kiosk kit comes with:
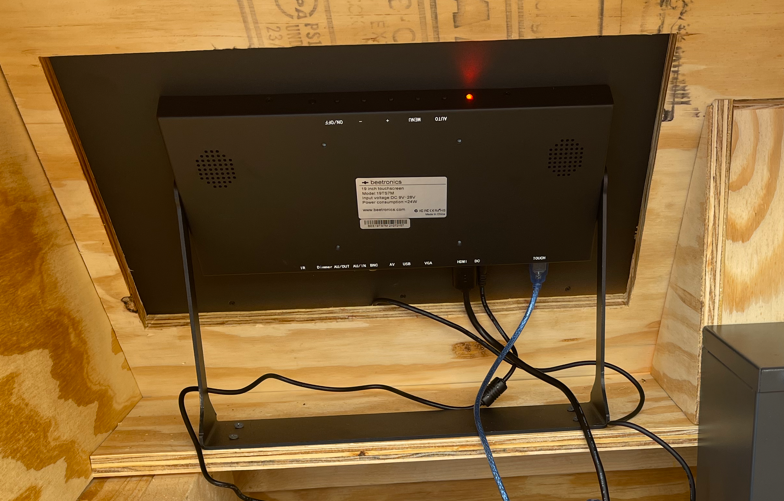
Beetronics high-brightness touchscreen monitor.
- Dimensions: 16 x 10.13 x 1.75 Inches
- Dimensions without front rim: 15.75" wide x 9.75" high
- Weight: 6.8 pounds

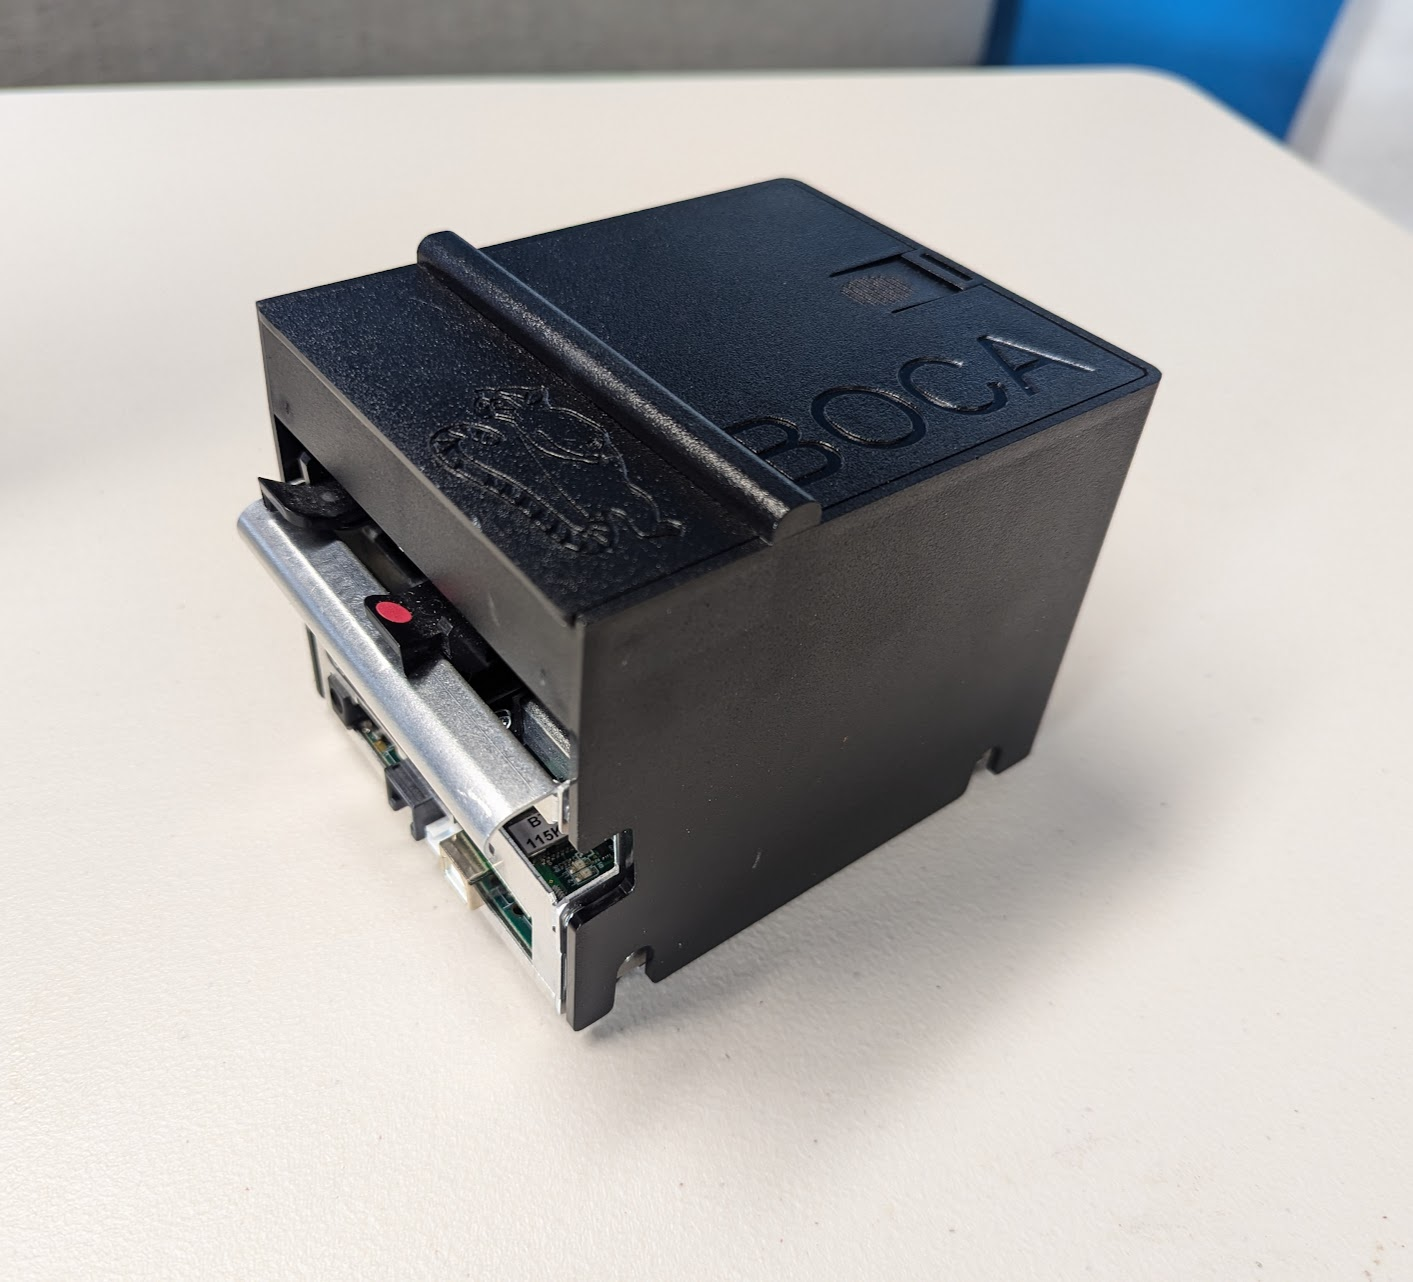
Boca Lemur X ticket printer with catch tray
- Dimensions: 4.5 x 6 x 4 Inches
- Weight: 2.2 pounds
|
|
|
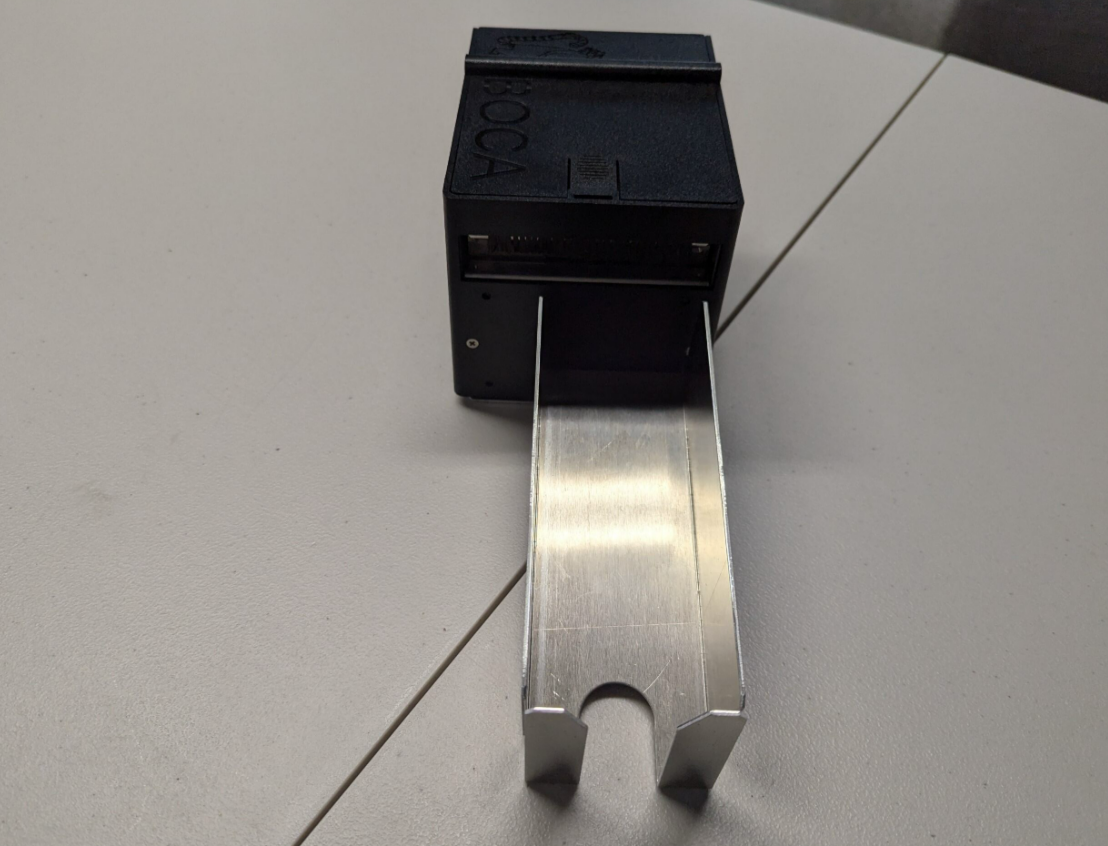
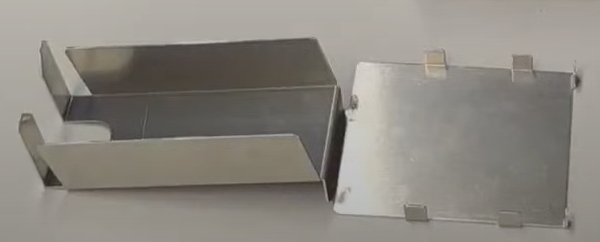
Printer ticket catch tray
- Dimensions: 12 x 4 x 3 Inches
- Weight: 0.4 pounds
- Opening required for ticket catch: 3 x 3 inches level with bottom of printer
Mini PC
- Dimensions: 4.5 x 5 x 1.75 Inches
- Weight: 0.65 pounds

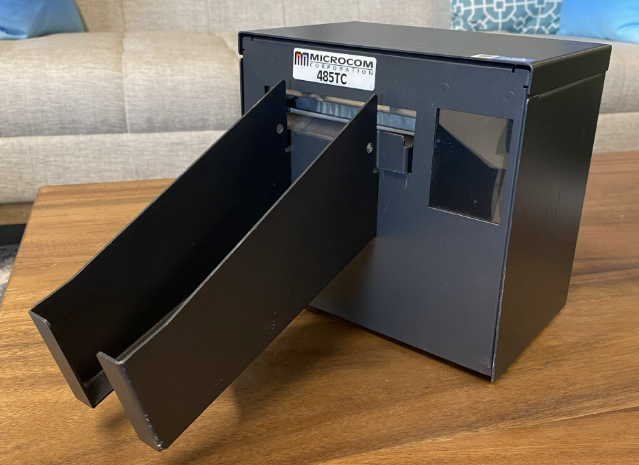
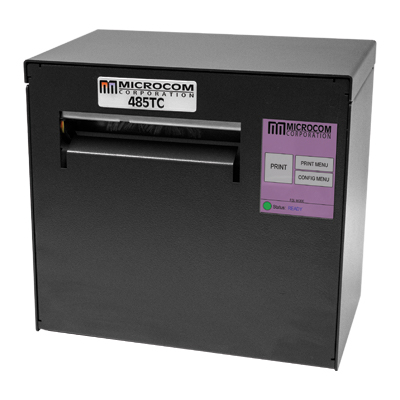
Alternate printer - Microcom 485TC
This type of printer can be used with kiosks, but it is no longer shipped out with kits unless specifically requested.
- Dimensions: 8 x 5.25 x 7.25 Inches
- Weight: 10.35 pounds
- Opening required for ticket catch: 3" wide x 4" high, beginning 2.5" above printer base.
|
|
|
Card Reader Dimensions
The card reader you recieve will vary depending on your payment processor/gateway setup. These card readers are offered:
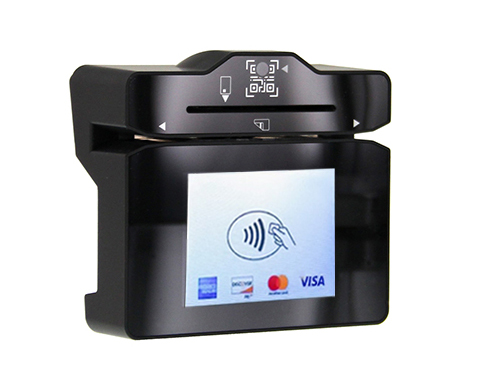
Dynaflex PED (Swipe, chip, tap-to-pay, requires Magensa payment gateway)
- Dimensions: 4 x 3.5 x 2 Inches
- Weight: 0.65 pounds
Mounting a card reader
Card readers should be securely mounted to the front of the kiosk enclosure to ensure they don't fall off during transactions. While Velcro strips can be used, the most secure option is mounting the card reader with screws.

When designing an enclosure or mounting bracket, make sure there is adequate clearance for cardholders to swipe, insert, and tap. If the solution design includes metal objects anywhere near the device, including metal enclosures, ensure that at all points the metal is no further forward than 15mm below the top face of the device. Proximity to metal can adversely affect the device’s performance.


The mounting holes are designed to accommodate screw size M4 x 0.7mm and a maximum screw depth of 0.315 inches (8mm). The recommended torque range for installing the screws is 20 to 22 in-lbs. (2.3 to 2.5 N-m). See our Purchasing Equipment guide for links to purchase mounting screws.
For further guidance on building enclosures, review the Dynaflex II PED Installation and Operation Manual.
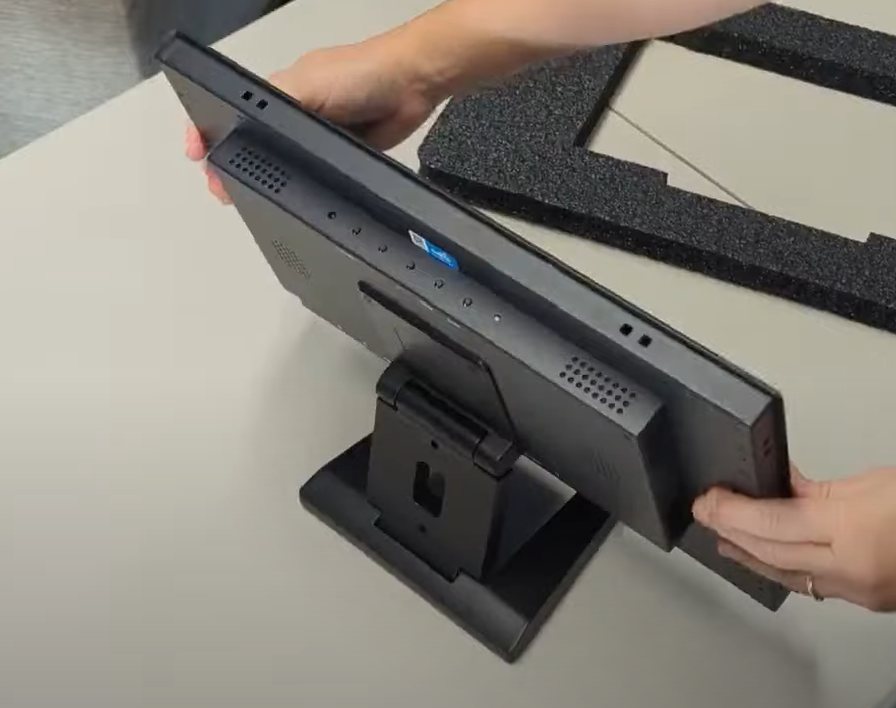
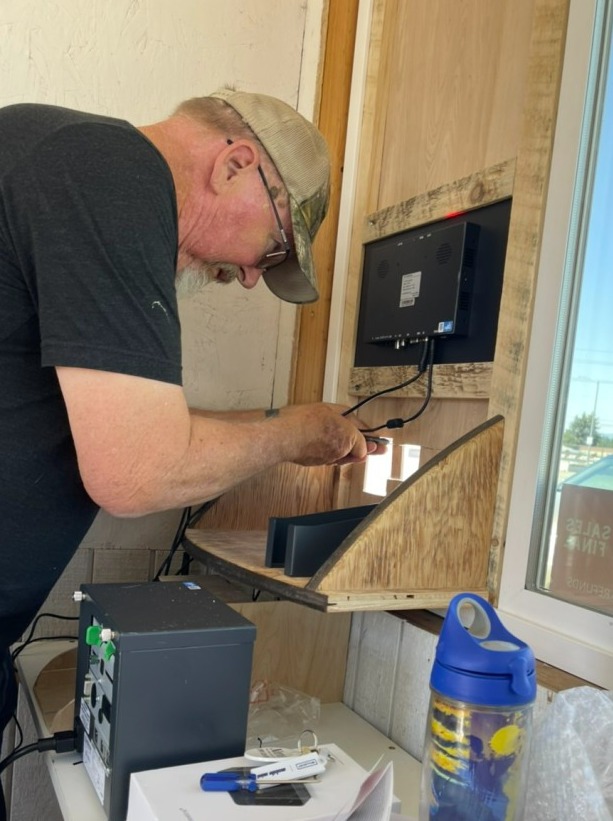
Mounting a monitor
Kiosk monitors are sent with a mounting kit attached that is compatible with both wall mounting and standing up on a tabletop. Depending on the setup and location you choose, you may need to securely mount the monitor to prevent theft or tampering. If you are setting up self-service in a monitored area, this may not be necessary.
For mounting flat or at an angle, use the keyhole mounts on the back of the monitor.
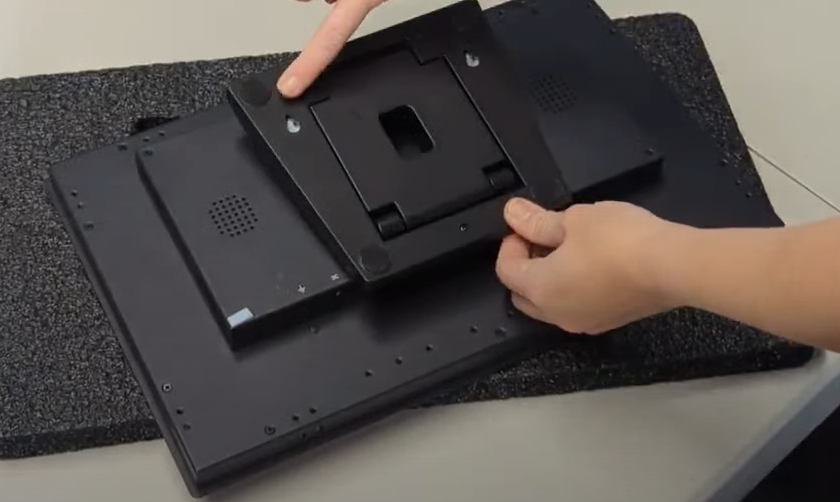
To leave standing, unfold the monitor stand until it the monitor is stable.
Ticket Catch Tray Opening
Ticket catch trays attach to the printer and do not need to be mounted. They do, however, need to face through an opening to allow users to retrieve tickets. See above for cutout dimensions. The ticket printers used for kiosks have cutters in them, so tickets will not wait for users to tear them, but will fall.
Things to Keep in Mind
Security
Kiosks are meant for unattended use, and should be set up with security in mind. Enclosures should close securely and lock to prevent tampering or theft.
Connectivity
Kiosks rely on an internet connection to function, and should always be located where they will have reliable connectivity. This can mean being situated where they can have ethernet connected directly to them, or be in a spot with a strong Wi-fi connection.
Weatherproofing
Kiosks should be located where they will be out of the rain and other inclement weather. Also keep in mind that sun glare may make it more difficult for users to see the options on the screen.
Equipment to keep on hand
Though it looks like a tablet, the kiosk is really a small computer and is most easily set up with a mouse and keyboard. Many clients keep a mouse and keyboard in their enclosures for quick access when troubleshooting is needed.
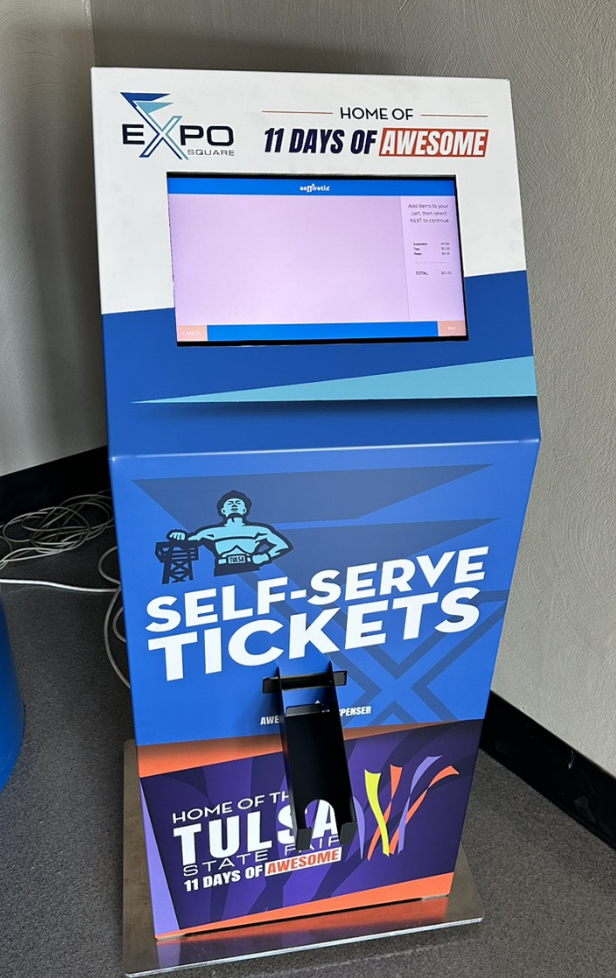
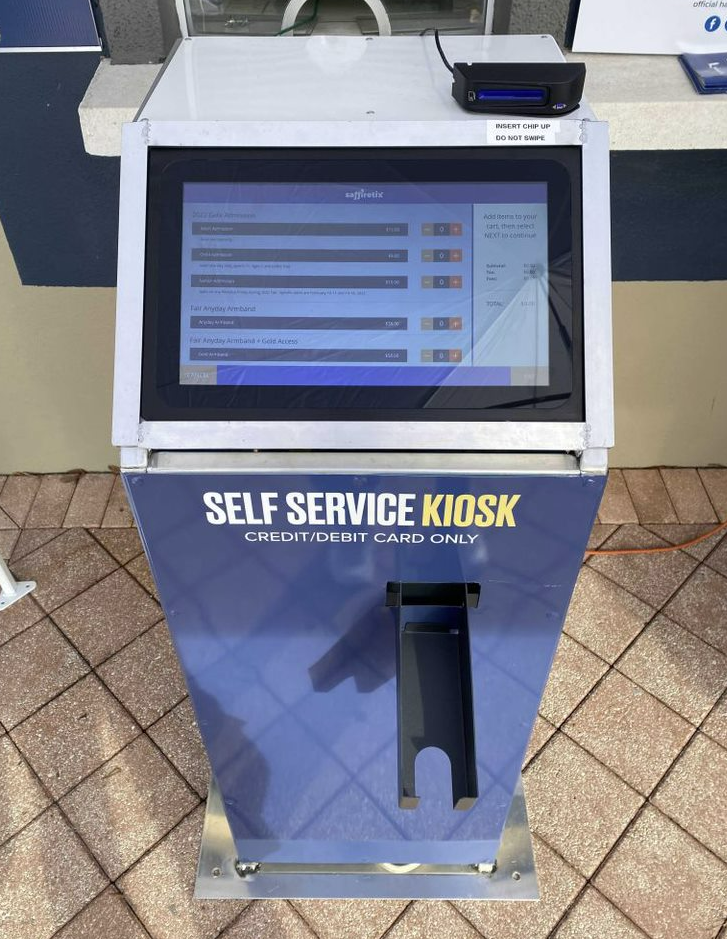
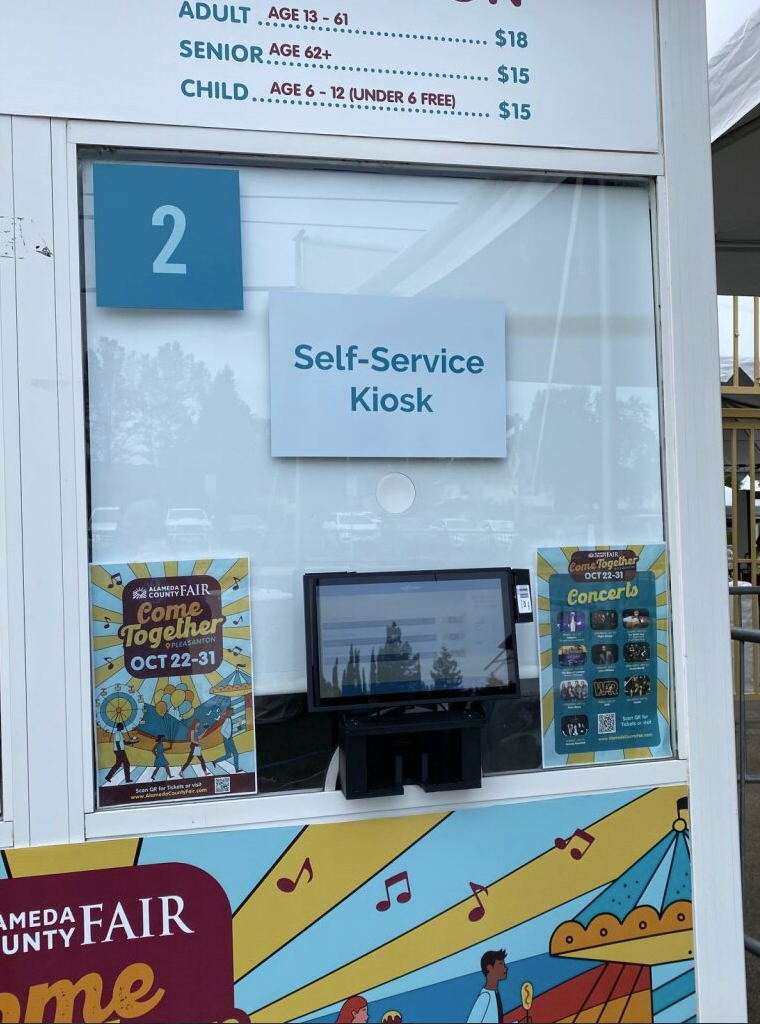
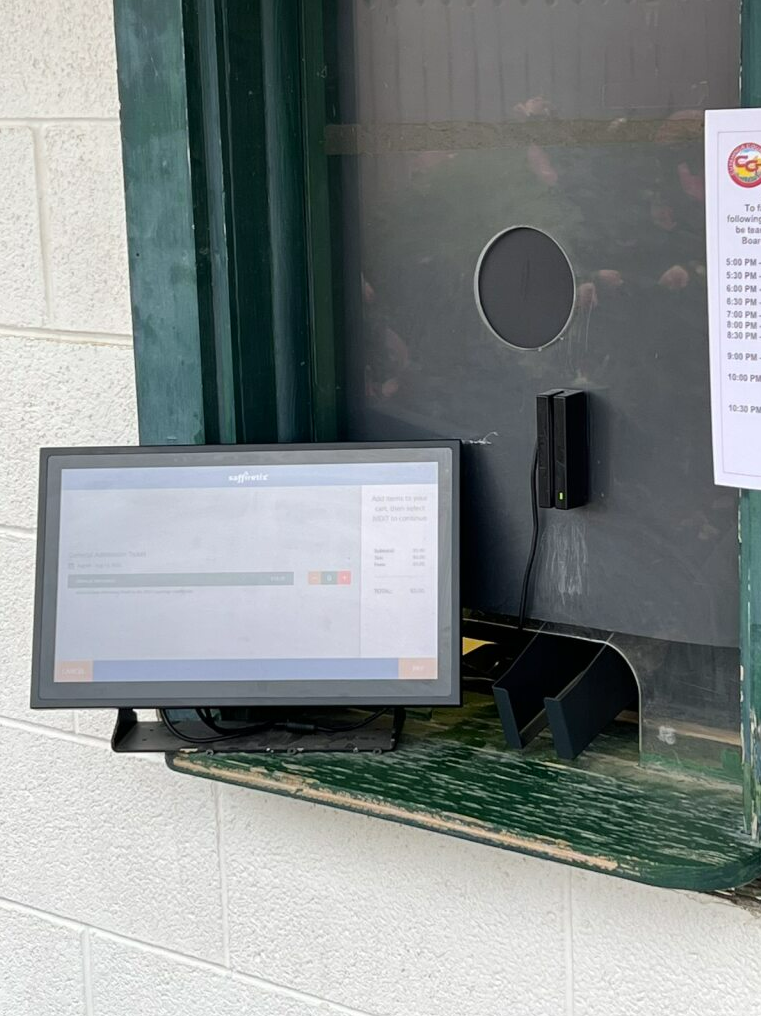
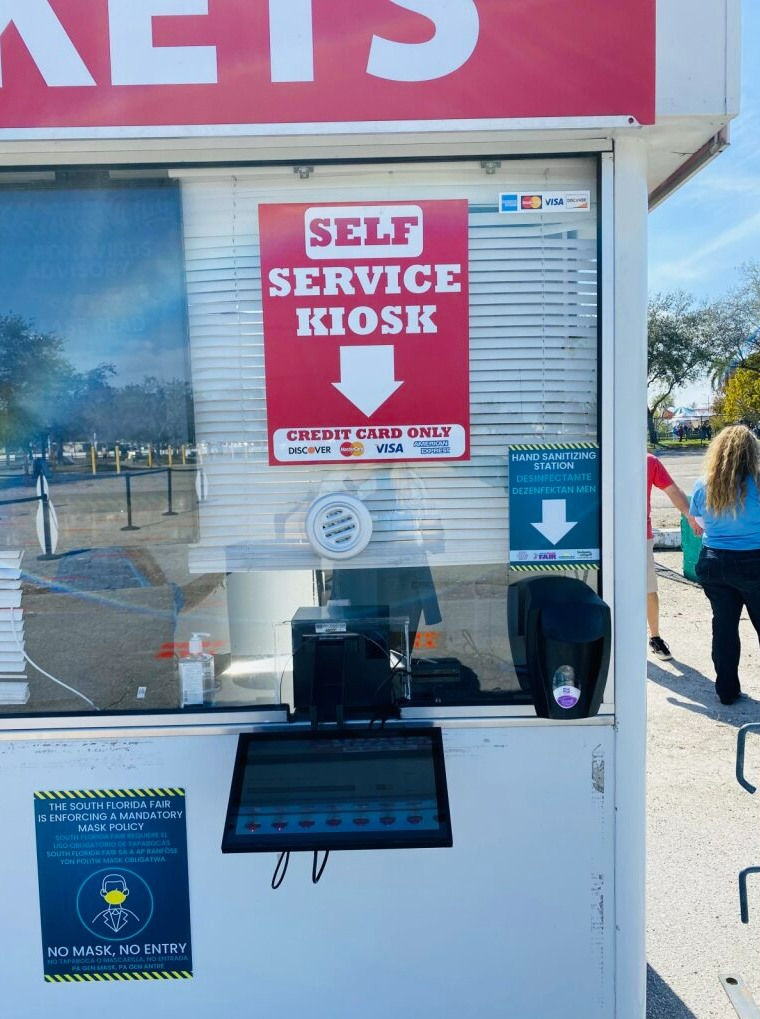
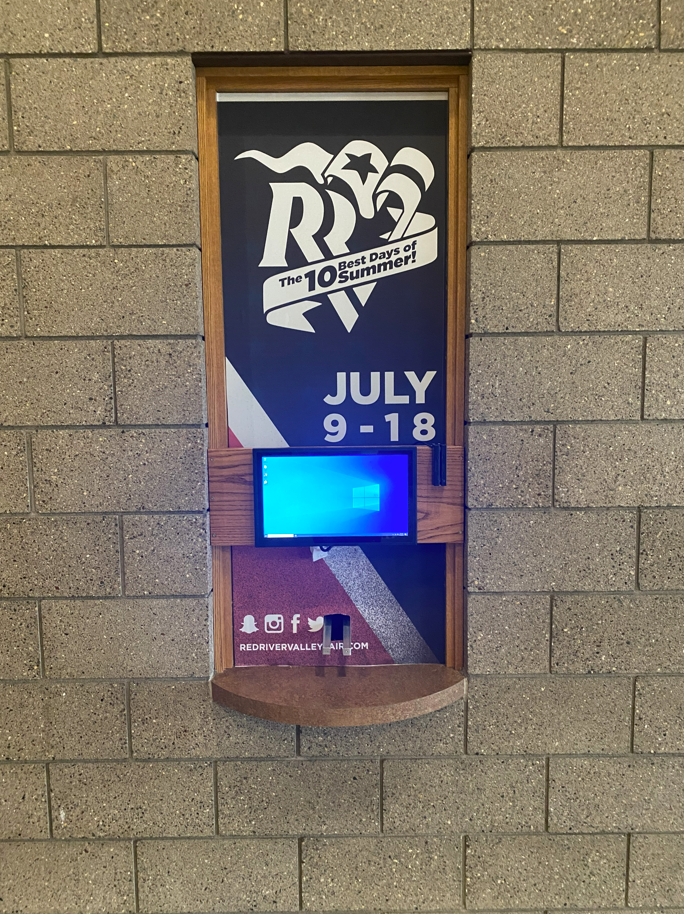
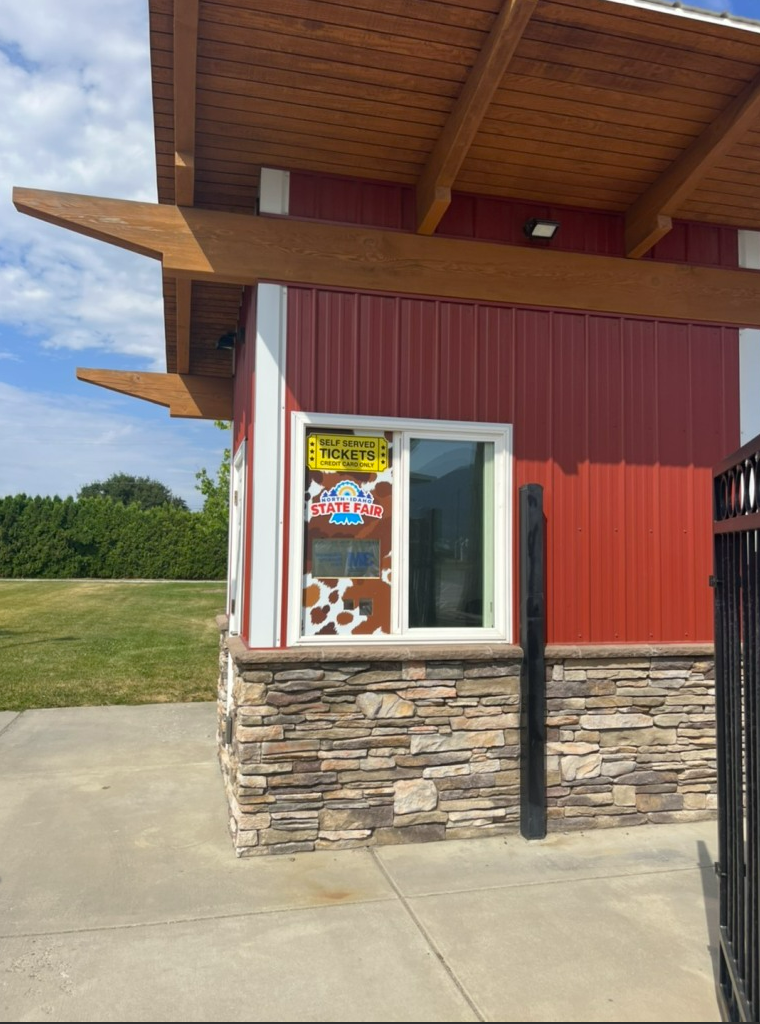
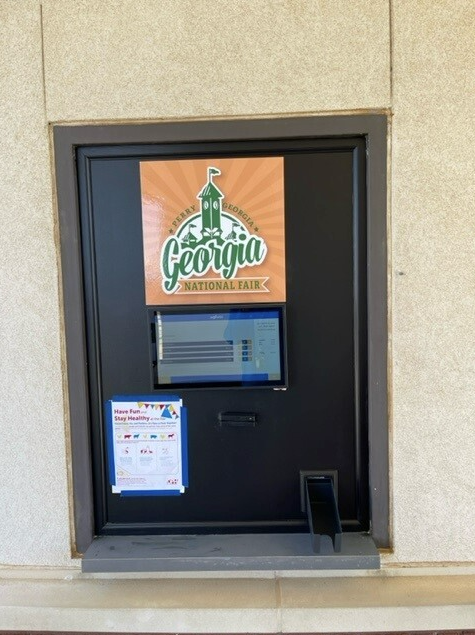
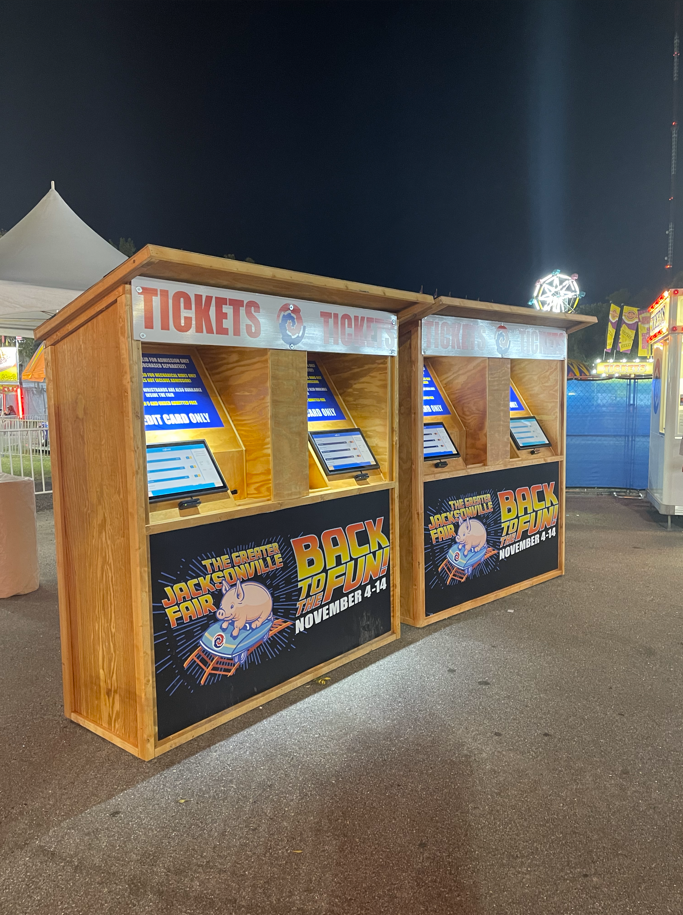
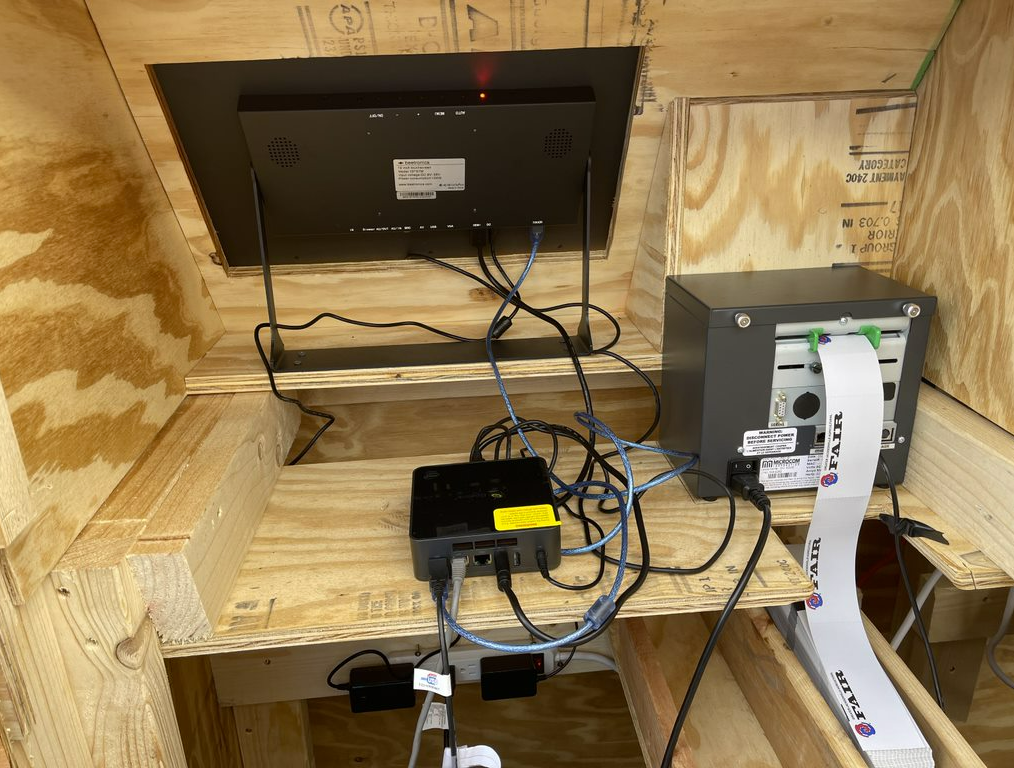
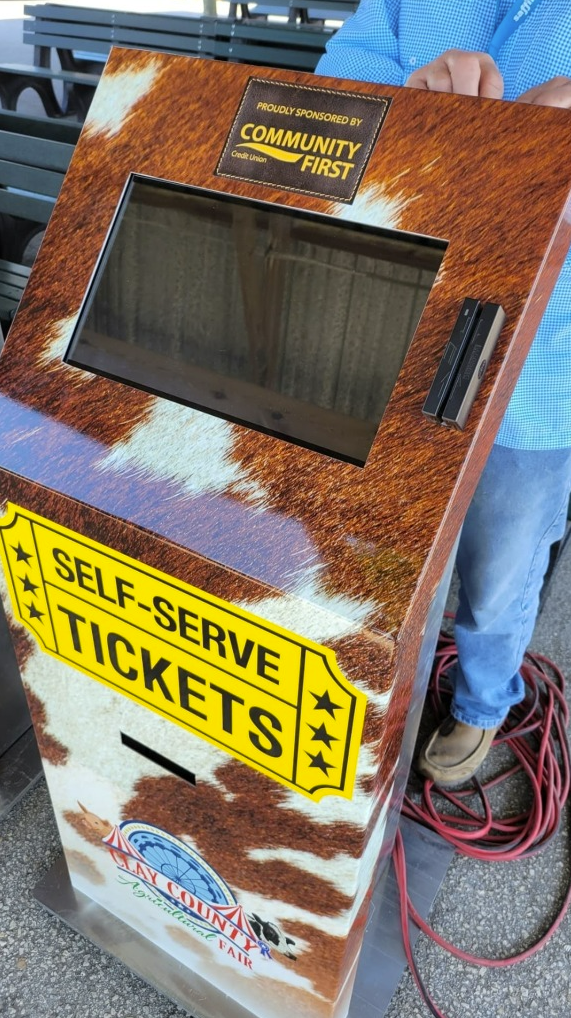
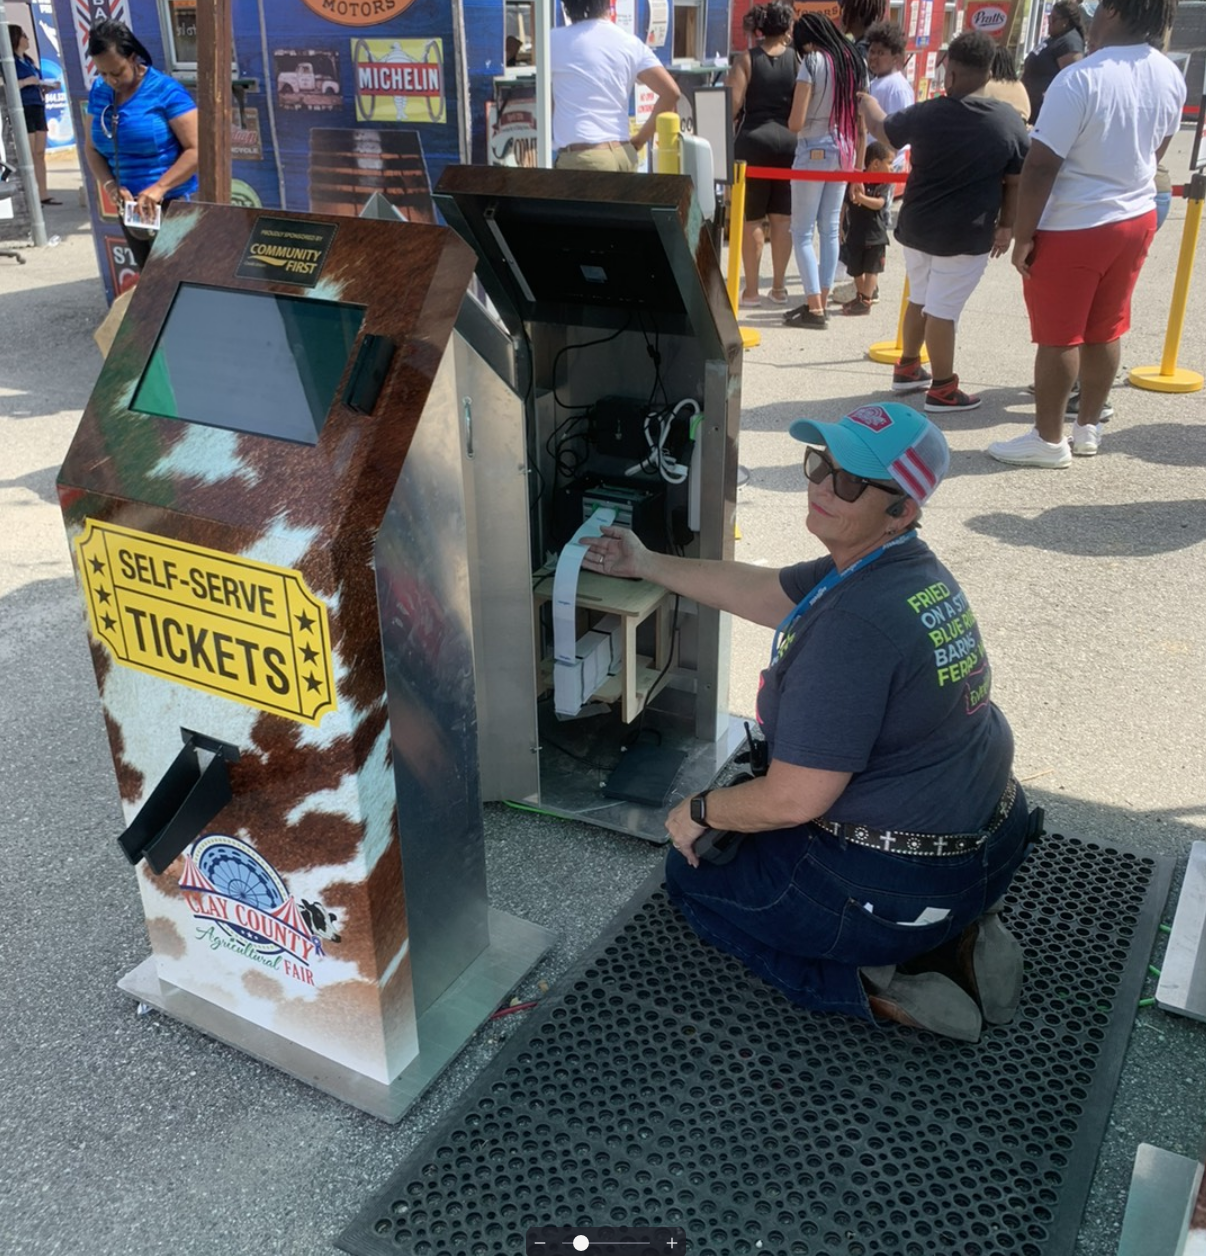
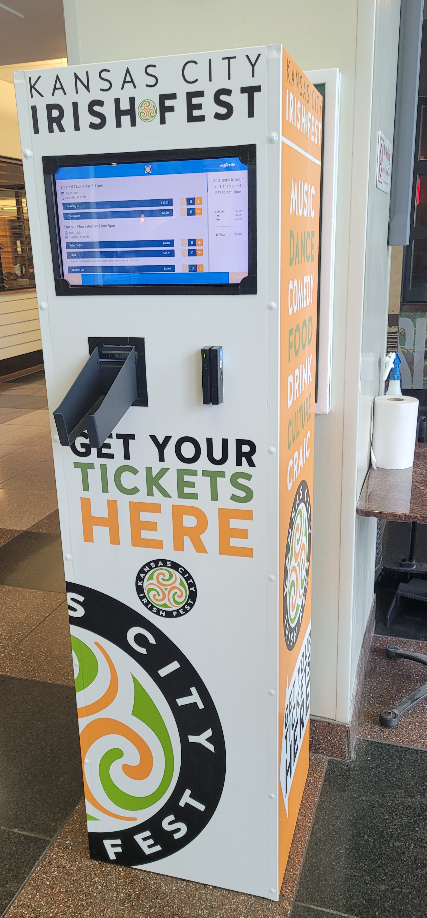
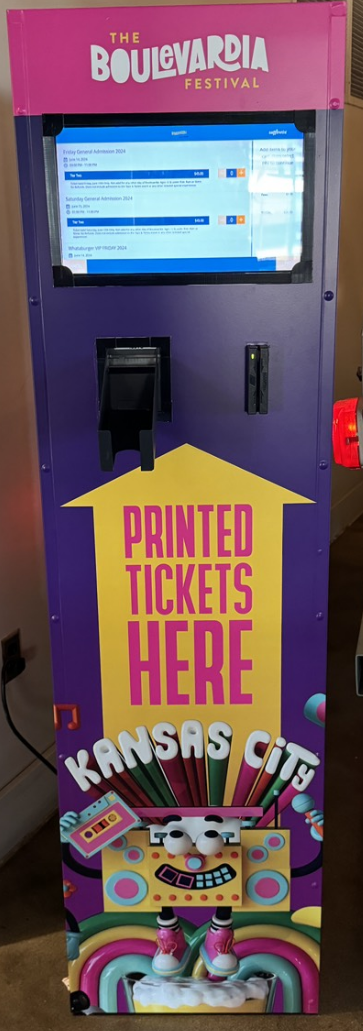
Kiosk Enclosure Examples
Here are some of the great ideas our clients have come up with in the past. Equipment can be passed through existing windows, or a board can be put up to mount equipment into in place of the window (in cases where the window can be removed or left open).
Enclosures at a Ticket Window
|
|
|
|
|
|
Here's a look at a kiosk being set up in a window.
|
Free-standing Enclosures (plywood or metal)
|
|

|

|
|
|
Out of the Box Ideas
These enclosures are built from metal lockers customized to fit the screen and printer.
|
|
|
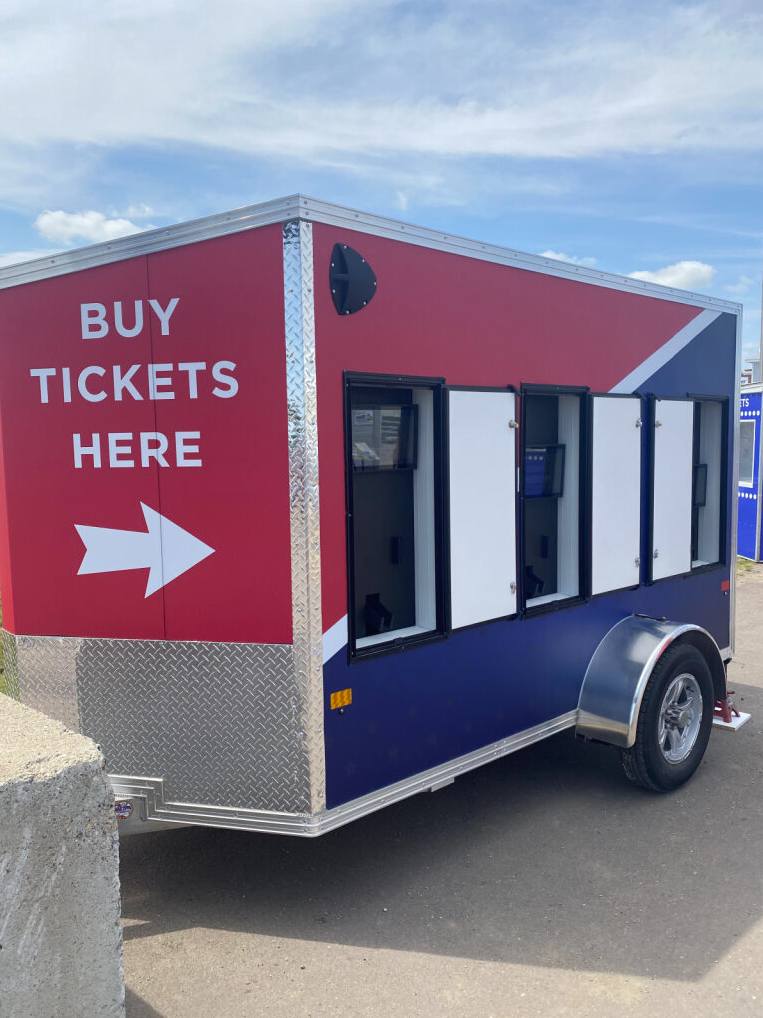
These kiosks are mounted inside a trailer for easy relocation. They even have doors to keep them secure at night!