
Microcom 520 Troubleshooting
IN THIS ARTICLE
Troubleshooting First Steps
Properly Loading Ticket Stock
QR Code Printing at the Wrong End
QR Code Crosses Tearaway Line
Text Printing Too Small
Printing with URL
Ticket Print is Crooked
Blank Ticket Prints
Tickets are Streaked or Smeared
Printer LED Flashing Red
Print Looks Faded
Stock Feeding Out Too Far
Tickets Not Printing
RELATED ARTICLES
Microcom 520 User Guide
Microcom 520 Driver Installation
Laptop Kit Setup
The Microcom 520 printer is a thermal printer ideal for ticket printing and is the recommended printer for SaffireTix Laptop Kits. In this article, you will find troubleshooting steps that can help you with issues that you may run across with your Microcom 520 printer. If you do not find the information you are looking for in this article, please use the orange "Help" button on the bottom right corner of the page to use our Chat, email us at support@saffire.com, or call 512-430-1123.
Troubleshooting First Steps
- When approaching a troubleshooting situation, try to think about what you do know. Was it working before? If so, what changed? Perhaps the system was moved to a new location, or a new user has logged in. Thinking about what you do know can help you to figure out what the best questions are to ask.
- Have you tried turning it off and on again? Sometimes this is enough to get things moving as intended. We particularly recommend turning the printer off, unplugging all cables, powering down your system, and waiting a minute or two to let everything cycle down. Then plug everything back in, reboot your system, and try another test print. If this doesn't work, move on by finding the particular issue you are facing below.
- Is the printer plugged into the USB port as when the drivers were installed? Making sure the printer stays plugged into the same USB port ensures your system is able to find it correctly. If you are connecting to a SaffireTix laptop or PC, plug the printer into the port marked Printer.
- Is your system sufficiently powered? Sometimes when devices are set up at remote locations, there may not be sufficient power for everything to work optimally. This may result in behavior that looks like an equipment issue, but is really just because a printer motor is just a little bit under powered. Bear in mind that powering devices off of long extension cords or overtasking a single breaker with too many devices can have unexpected results. Even inside a building, trying to power too many machines off of one breaker can cause things to behave poorly. Talk to your IT team about whether everything is getting sufficient power.
- Check for duplicate printer instances. Sometimes when a printer is not being detected it is due to there being a previous installation of the printer driver that is being seen instead. To check for this, open Settings > Bluetooth and Devices > Printers and Scanners. Remove all instances of other Microcom printers, then reinstall the printer drivers. See our Driver Installation Guide for further details.
- Reinstall printer drivers. If none of the suggestions work, you may be able to get things working again by reinstalling the printer driver. We recommend removing the currently installed printer driver through the driver installation wizard, rebooting your system, and reinstalling the driver. For detailed instructions, see Microcom 520 Driver Installation.
Properly Loading Ticket Stock
Make sure that the ticket stub is entered first, so it should be the first part that is printed on. The black bar on the back of the printer should be at this leading end as well, and the logo should be at the far other edge of the ticket.
Full instructions for loading ticket stock can be found on the Microcom 520 User Guide.
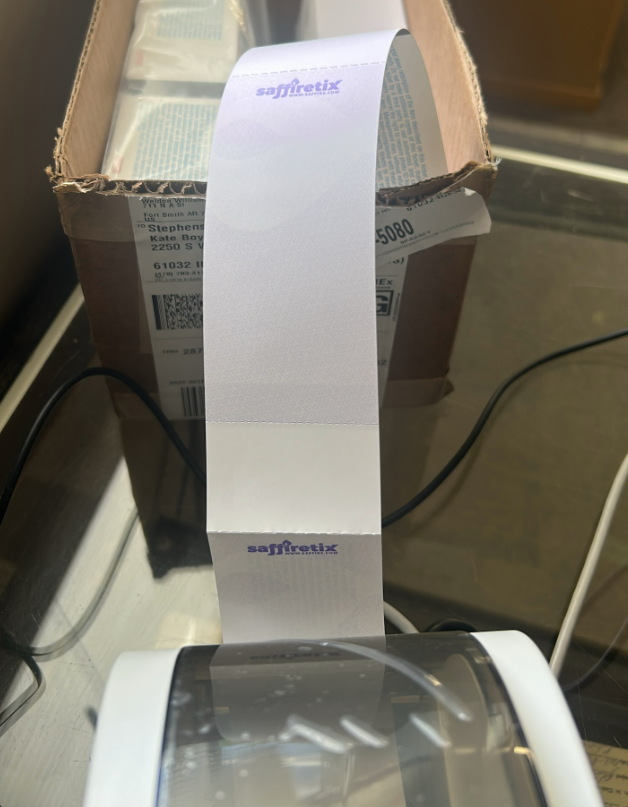

Sometimes, a ticket will get torn so that it is difficult to tell which is the correct end of the stack of tickets. If this happens, check the back of the ticket and make sure the control number is the same on the stub and ticket. The stub should be loaded first, with the logo at the opposite end.

After loading stock, press the button on the top of the printer to have the ticket feed through the machine and realign. Then, process a test print.
Full instructions for loading ticket stock can be found on the Microcom 520 User Guide.
Tickets Not Printing from Box Office
The yellow Chrome desktop link is specially prepared to skip the print preview so you can print quickly from your Box Office. If tickets are not printing from Box Office, Follow these steps to troubleshoot:
- Open Windows printer settings and navigate to this printer (SNBC BTP-L520 BPLE).
- Click Print Test Page.
- If a test successfully prints, it indicates that your printer driver is installed and the computer port and printer cable are all functioning. Continue to the section below, Selecting the Correct Printer in Chrome.
- If a test print fails, continue to step 3.
- Check to make sure the printer is turned on and plugged in to the wall and connected via USB-B cable to the computer. The standard USB end of the cable should be plugged into the computer, while the square USB-B end should be plugged into the printer.
- Check to make sure ticket stock is loaded.
- Check that the LED on the top of the printer is lit green.
- If it is yellow, press the button next to the LED once and the light should turn green. Try your test print again.
- If the light is red, see Printer LED Flashing Red below.
- Swap out the printer cable with a new one to be sure your cable is not damaged. Even if the cables do not look damaged, it can be helpful to change the connection cables to rule out that option as what may be causing the printing issue.
- Try uninstalling, rebooting, and reinstalling the driver. Here is an article that provides those steps: Microcom 520 Driver Guide
Selecting the Correct Printer in Chrome
If you are able to print a test ticket from Windows settings, but your print is not coming out when you sell a ticket at Box Office, Chrome may be attempting to print to a different printer model. This usually looks like the print preview window is flashing up very quickly and disappearing before you can select a printer.
To correct this, you will need to close this window and complete these steps, so please read through the steps fully first.
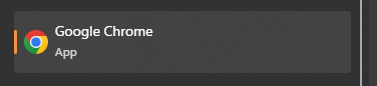
- Close all Chrome windows, and open a new Chrome window by opening the Windows search bar and typing Chrome. Open the multicolored Chrome link.
-

-
- Right click anywhere and select Print, or press Control-P.
- When the print dialogue appears, select the correct printer in the dropdown.
-
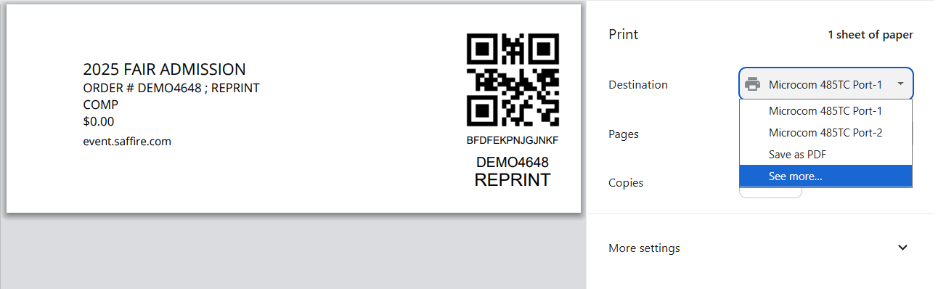
- Do not press print here, once the correct printer is selected you can close the entire Chrome window.
- Open Chrome again using the yellow desktop link.
- Open the test print PDF and attempt to print again.


QR Code Printing at the Wrong End (Printing Backward)

Ticket stock may be installed backward. To fix, turn the whole stack of stock over and feed it in from the other end. Follow instructions above or visit the Microcom 520 User Guide.
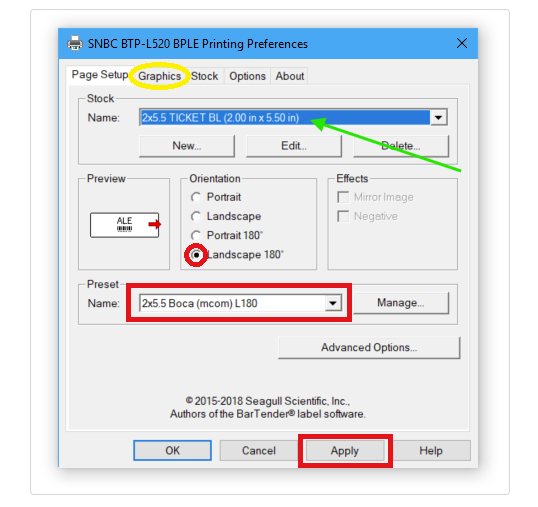
If your stock is loaded correctly, you may need to change the orientation in print settings.
Open Control Panel, View devices and printers. Right click on the Microcom 520 and select: Printing Preferences. Orientation should always be set to Landscape 180 degrees.
QR Code Crosses Tearaway Line
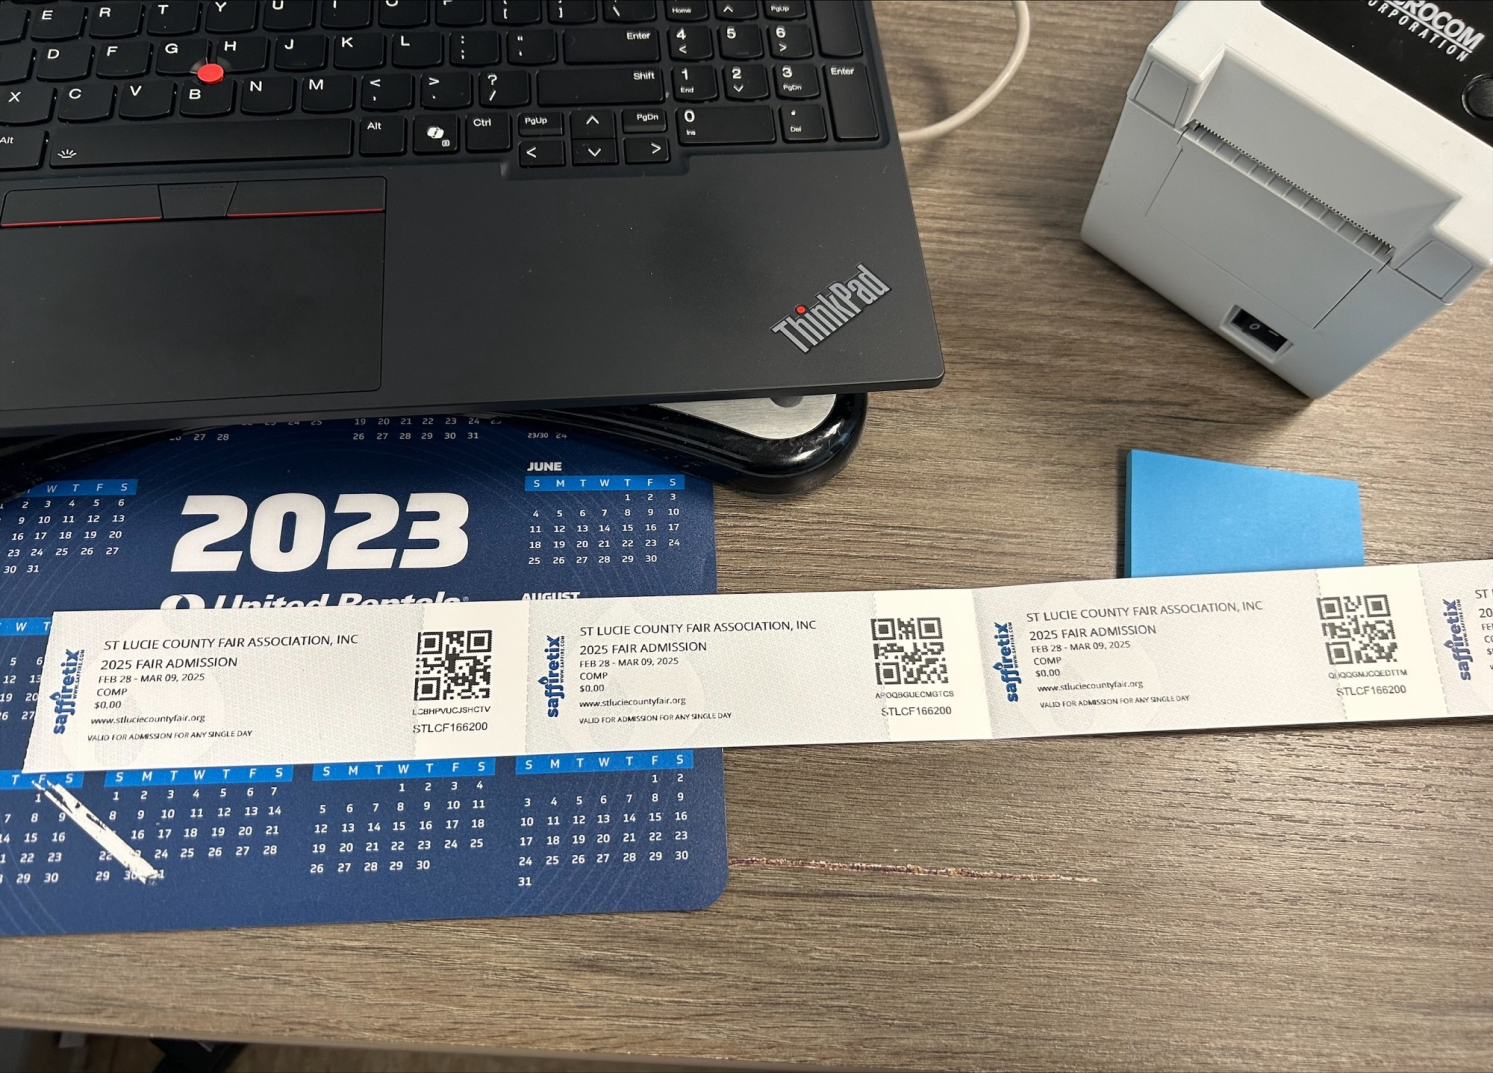
You may need to adjust your printer settings. Stock should be set to Continuous (Fixed Length).

Text Printing Too Small
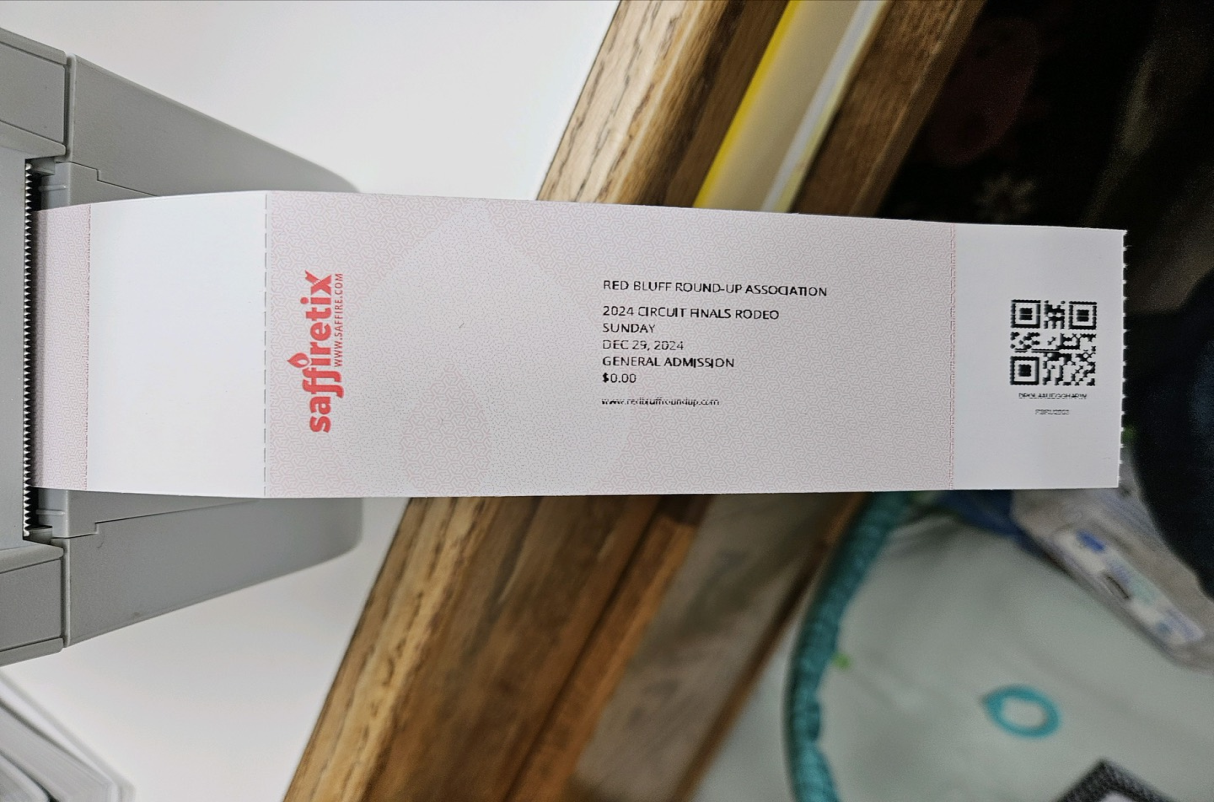
Check your printer settings to ensure the size is set to 2X5.5.

If you do not see the option in this drop-down menu for the 2X5.5 Boca L180 preset, you may need to download and add our configuration file to your printer settings. See details on the Microcom 520 Driver Installation page.
Print size can also be adjusted in your print preview, where the scale may be set to less than 100%.
Full instructions for printer configuration can be found on the Microcom 520 User Guide.
Tickets Print with URL at Top and Bottom

If the tickets are printing correctly, but the print is small and includes your ticket URL, date, and page numbers, your Chrome settings might have the headers and footers selected to print. To check this, look at your printer settings before the ticket prints. You may need to open up the More Settings dropdown at the bottom.
If your Box Office is set to bypass the print dialogue, you won't be able to do it there. In that case, you can open a Chrome browser, and open something to print (even just right clicking an selecting print works for this). You can look at this setting, make sure it is unchecked, and if you make a change here it will update the default for the whole browser.
You should then be able to refresh the Box Office page (hit Control-F5), and try printing again to see if it is looking better.

Ticket Print is Crooked
If the tickets are printing, but the text is crooked, check to make sure the stock is loaded correctly. Follow instructions above, or visit the Microcom 520 User Guide.
Blank Ticket Prints
Sometimes the first ticket will print fine, then leave a blank before continuing on.
Close the lid to the printer and press the round feed button on the top of the printer to prepare to print. Now press that feed button one more time to spit out a single blank ticket. This should calibrate the printer to the start of the next ticket without having to guess.
Tickets are Streaked or Smeared
If your tickets are printing with irregularities, you may need to clean the printer's print head and/or rollers. Follow instructions on the Microcom 520 User Guide.
Printer LED Flashing Red
If the red LED light is flashing and your printer is not connecting, the printer lid may be ajar, or the sensors may not be able to sense that it is fully closed. Sometimes cleaning the print heads can clear this up. Visit the Microcom 520 User Guide for instructions to clean the print head and roller, and clear any lint or debris from the inside of the printer. If it is still flashing red, you can try holding down the top of the lid. If the printer stops blinking, it may be an indication that there is a problem with the lid hinges that is preventing it from fully closing.
Check the locations in the images below for gaps at the hinges, broken black hooks, or a loose print head preventing the lid from fully closing.

The sensor tab noted in the below image allows the printer to detect if the lid is fully closed. If this tab has broken off the printer will not detect a correctly closed lid.

Printer Lid Won't Close
If your printer lid won't close there may be a problem with the lid hinges that is preventing it from fully closing. Check the locations in the images below for gaps at the hinges, broken black hooks, or a loose print head preventing the lid from fully closing.
The sensor tab noted in the below image allows the printer to detect if the lid is fully closed. If this tab has broken off the printer will not detect a correctly closed lid.
If you are able to locate a piece out of place causing the printer to not close, you may be able to correct it by removing any foreign objects that have been stuck in the printer or realigning the plastic with your hands, but in most cases if there is something wrong with the lid hinges Saffire may need to send you a replacement for your rental printer. If it is a printer that your office owns, contact Microcom support for guidance on realigning hinges or replacing broken parts.
Print Looks Faded
If the print looks faded, it might have the appearance of an inkjet or laser printer that is low on ink. Since the Microcom 520 is a thermal printer, there is no ink or toner for it to be low on, but an incorrectly closed lid can create this effect. Look at the areas of the printer outlined above in the section Printer LED Flashing Red to look for the cause of a lid not fully closing.
This can also be diagnosed by pressing gently down on the printer lid to simulate a firmly closed lid. If a ticket printed while the lid is gently pressed down looks correct, the lid may be the issue. If not, you may need to clean your print head. Follow Print Head Cleaning Guide to see if this improves your print quality.
Stock Feeding Out Too Far

If the stock feeds out too far when you press the ticket feed button, it may not be correctly sensing the timing bar on the back of the ticket. To remedy this, here a are a few things to try:
- You may just need to run a test print rather than pressing the feed button. Open print settings and select the printer, then click Print Test Page. This may be enough to reacalibrate the printer.
- You should also try cleaning the print head, feed sensor, and roller. See instructions here.
- If it is still not finding the correct ticket end location, follow this guide to uninstall and reinstall the printer driver.