
Microcom 520 Printer User Guide
IN THIS ARTICLE
Unboxing and Plugging In
Loading Ticket Stock
Connecting to a Computer
Cleaning Print Heads
RELATED ARTICLES
Microcom 520 Troubleshooting
Microcom 520 Driver Installation
Laptop Kit Setup

The Microcom 520 printer is a thermal printer ideal for ticket printing, and is the recommended printer for SaffireTix Laptop Kits. This guide will walk you through the basic setup and maintenance for daily use.

Unboxing and Plugging in the Printer
- Unbox your Microcom 520 printer, and ensure that all components are included:
- Printer unit
- Power cable
- USB-A - USB-B cable
- Position the printer on a stable, flat surface near your computer.
- Plug the power cable into the back of the printer and connect it to a power outlet.
- Press the power button on the front panel of the printer to turn it on. The power light should illuminate, indicating the printer is ready.
Loading Ticket Stock
The SaffireTix platform is not compatible with rolled stock, it requires folded ticket stock to successfully print tickets. Disregard the roller feature of this printer when loading folded ticket stock.
To load ticket stock into the printer, follow these simple steps:
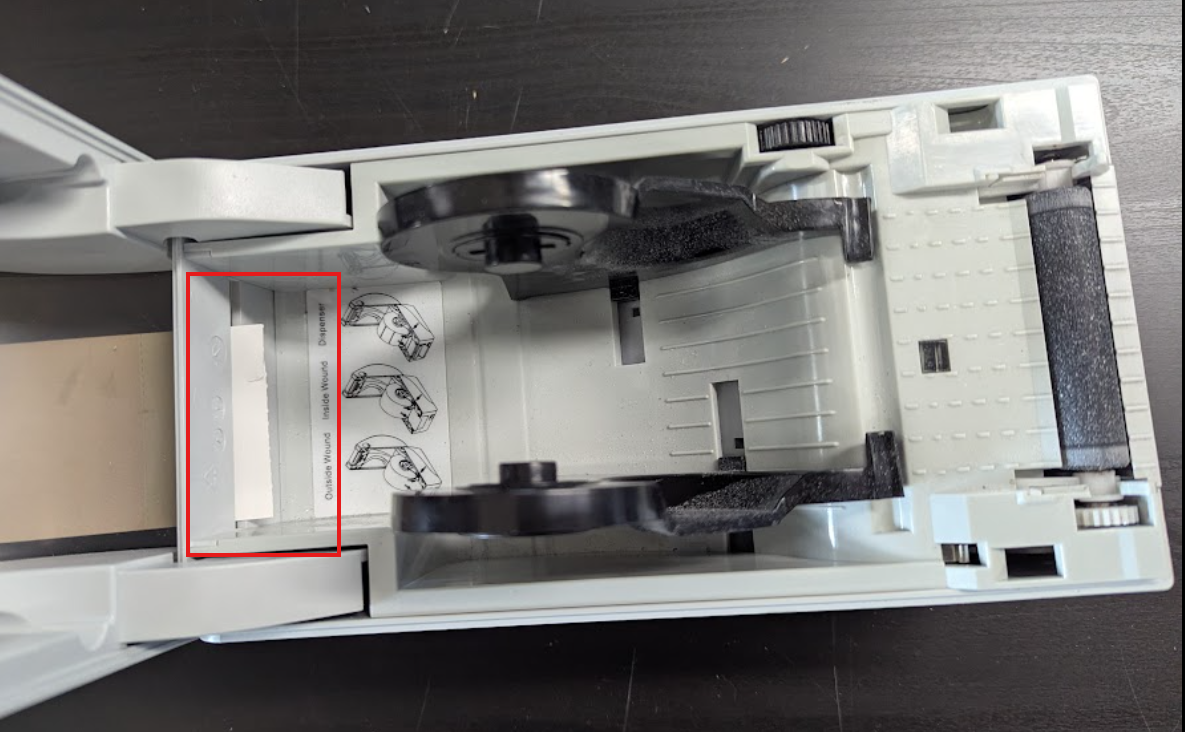
- Open the printer lid by squeezing the black tabs located on each side of the printer.
-
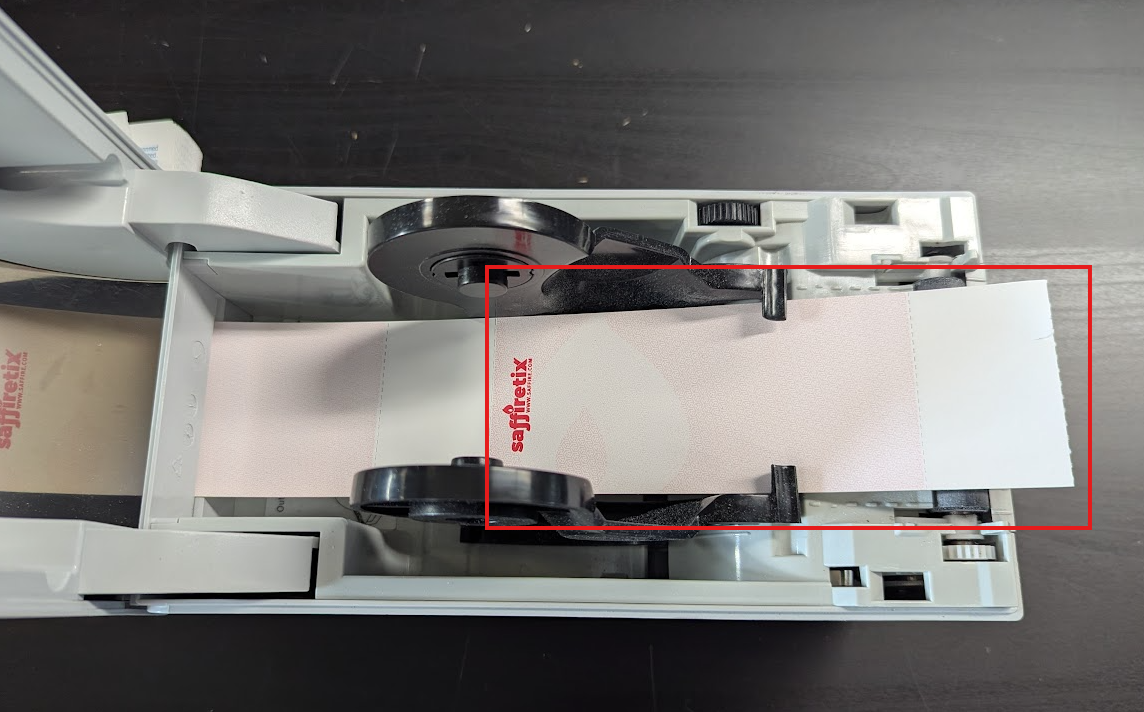
Feed the ticket stock through the back so that the perforated stub is the first thing to be printed on. The logo edge of the ticket will be the last thing to go through the printer.
-
To ensure proper ticket alignment, slide the ticket stub under the roll holder so that the ticket edges are being hugged by the guide.
-
Close the lid to the printer with the ticket barely protruding out of the front of the printer.
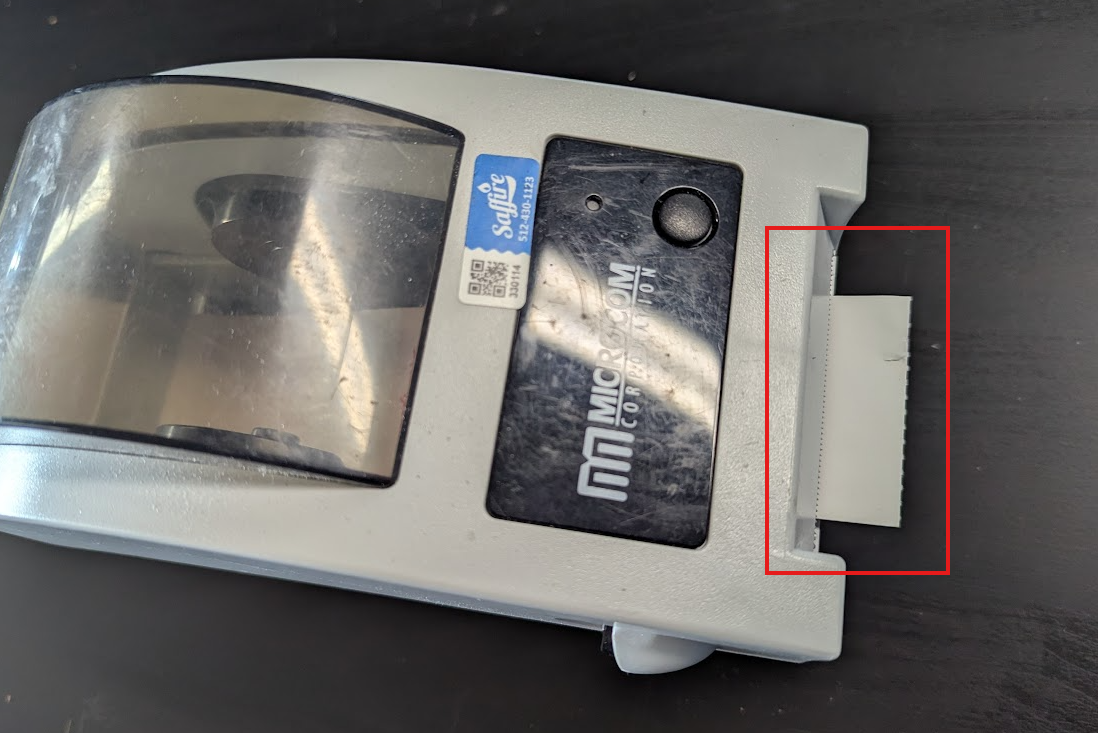
- Press the round feed button on the top of the printer to prepare to print. Now press that feed button one more time to spit out a single blank ticket. This should calibrate the printer to the start of the next ticket without having to guess.
- Running a test print of several tickets may be necessary to ensure the tickets are aligned properly for printing.


Looking for information about ticket stock? Visit our Ticket Stock Guide.
Connecting to a Computer
The Microcom 520 printer is connected to your computer via a USB cable, included in the printer kit box.
- Attach the green USB cable to the square shaped USB-B port on the back of the printer.
- Connect the other end of the USB cable to your computer in the port marked Printer.
- SaffireTix computers are shipped to you with all proper drivers pre-installed. If you're connecting a printer to your own computer, then you will need follow our Microcom 520 Printer Installation Guide.
- Follow this link to open our test print PDF in a new tab.
- Right click the ticket image and select print or click the printer icon in the top right-hand corner.
- Select the printer you would like to print to. You may need to click See More to find the right option.
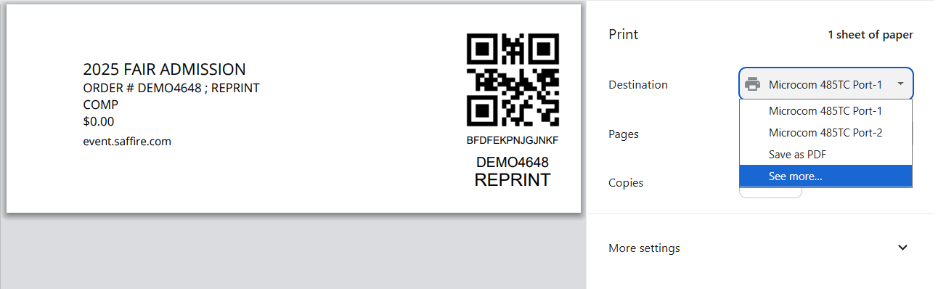
- When you click Print, the test print should be successful. If it is not, confirm that the correct printer is selected in Chrome.
- If you are not able to select the printer in the Chrome print dialogue because it disappears too quickly, please follow these steps:
- The yellow Chrome desktop link is specially prepared to skip the print preview so you can print quickly from your Box Office. If your print is not coming out, Chrome may be attempting to print to a different printer model. To correct this, you will need to close this window and complete these steps, so please read through the steps fully first.
-
Close all Chrome windows, and open a new Chrome window by opening the Windows search bar and typing Chrome. Open the multicolored Chrome link.


- Right click anywhere and select Print, or press Control-P.
-
When the print dialogue appears, select the correct printer in the dropdown.

- Do not press print here, once the correct printer is selected you can close the entire Chrome window.
- Open Chrome again using the yellow desktop link.
- Open the test print PDF and attempt to print again.
- If you need further assistance, check out our printers guide to find troubleshooting steps for the different printer models.


Cleaning the Print Head, Roller and Sensor
Regular print head cleaning is essential for optimal print quality.
- Power off the printer and unplug it from the power source.
- Open the top panel to access the print head.
- Using a lint-free cloth or cotton swab dipped in isopropyl alcohol, gently clean the print head and thermal element. Be sure to remove any buildup or debris from the thermal elements.
- Clean the printer sensor by blowing it off and wiping it down gently with a cotton swab dipped in rubbing alcohol.
- Wipe down the printer roller with rubbing alcohol, rolling it around gently to be sure the entire surface is clean. This can prevent streaks and ensure the tickets advance through the printer properly.
- Allow the print head/roller to air dry for a few minutes before closing the printer and powering it back on.
- While you have the printer open, check the inside for lint or residue. Use canned air or a soft brush to clean out debris. Be sure to wipe print head after blowing out debris as dust may stick to the freshly cleaned surface.

The printer sensor is located on the main print body, as seen below. This sensor can sometimes get obstructed by lint, grease, or even a fingerprint, causing the printer to think that the lid is open. Follow instructions above to clean this area.
