7.7 Release Notes
IN THIS ARTICLE
Purchase Policy
Cash/Card only Locations
Kiosk Configuration workflow
Other Improvements
As always, we encourage you to read the notes below and try out the new features for yourself. Please reach out via support@saffire.com if you have any questions!
Purchase Policy
Location: Commerce > Commerce Settings
This allows you to require your customers to accept a policy prior to making an online purchase.
The acceptance of this policy is recorded and available in the Purchases Report Export so that the customer's acknowledgement can be used in any Chargeback Disputes as compelling evidence to challenge Friendly Fraud reason codes.
We have provided some default language, but we STRONGLY ENCOURAGE you to add custom sections that are relevant to your organization. Things that would be great to add to this policy would include how your organization handles:
- Refunds
- Exchanges
- Transfers
- Chargebacks
- Disputes
- Venue Rules/Restrictions
- etc.

When you click Edit Content on your site, you will be able to update the policy using the WYSIWYG. You do not need to change anywhere on the Policy that is using the text {OrganizationName} or {SiteDefaultEmail} unless you wish these to be different than what is in your Site Settings.
After you've completed all of the content and changed out the DATE at bottom of the Policy, you will want to Publish Publish page and click Save.
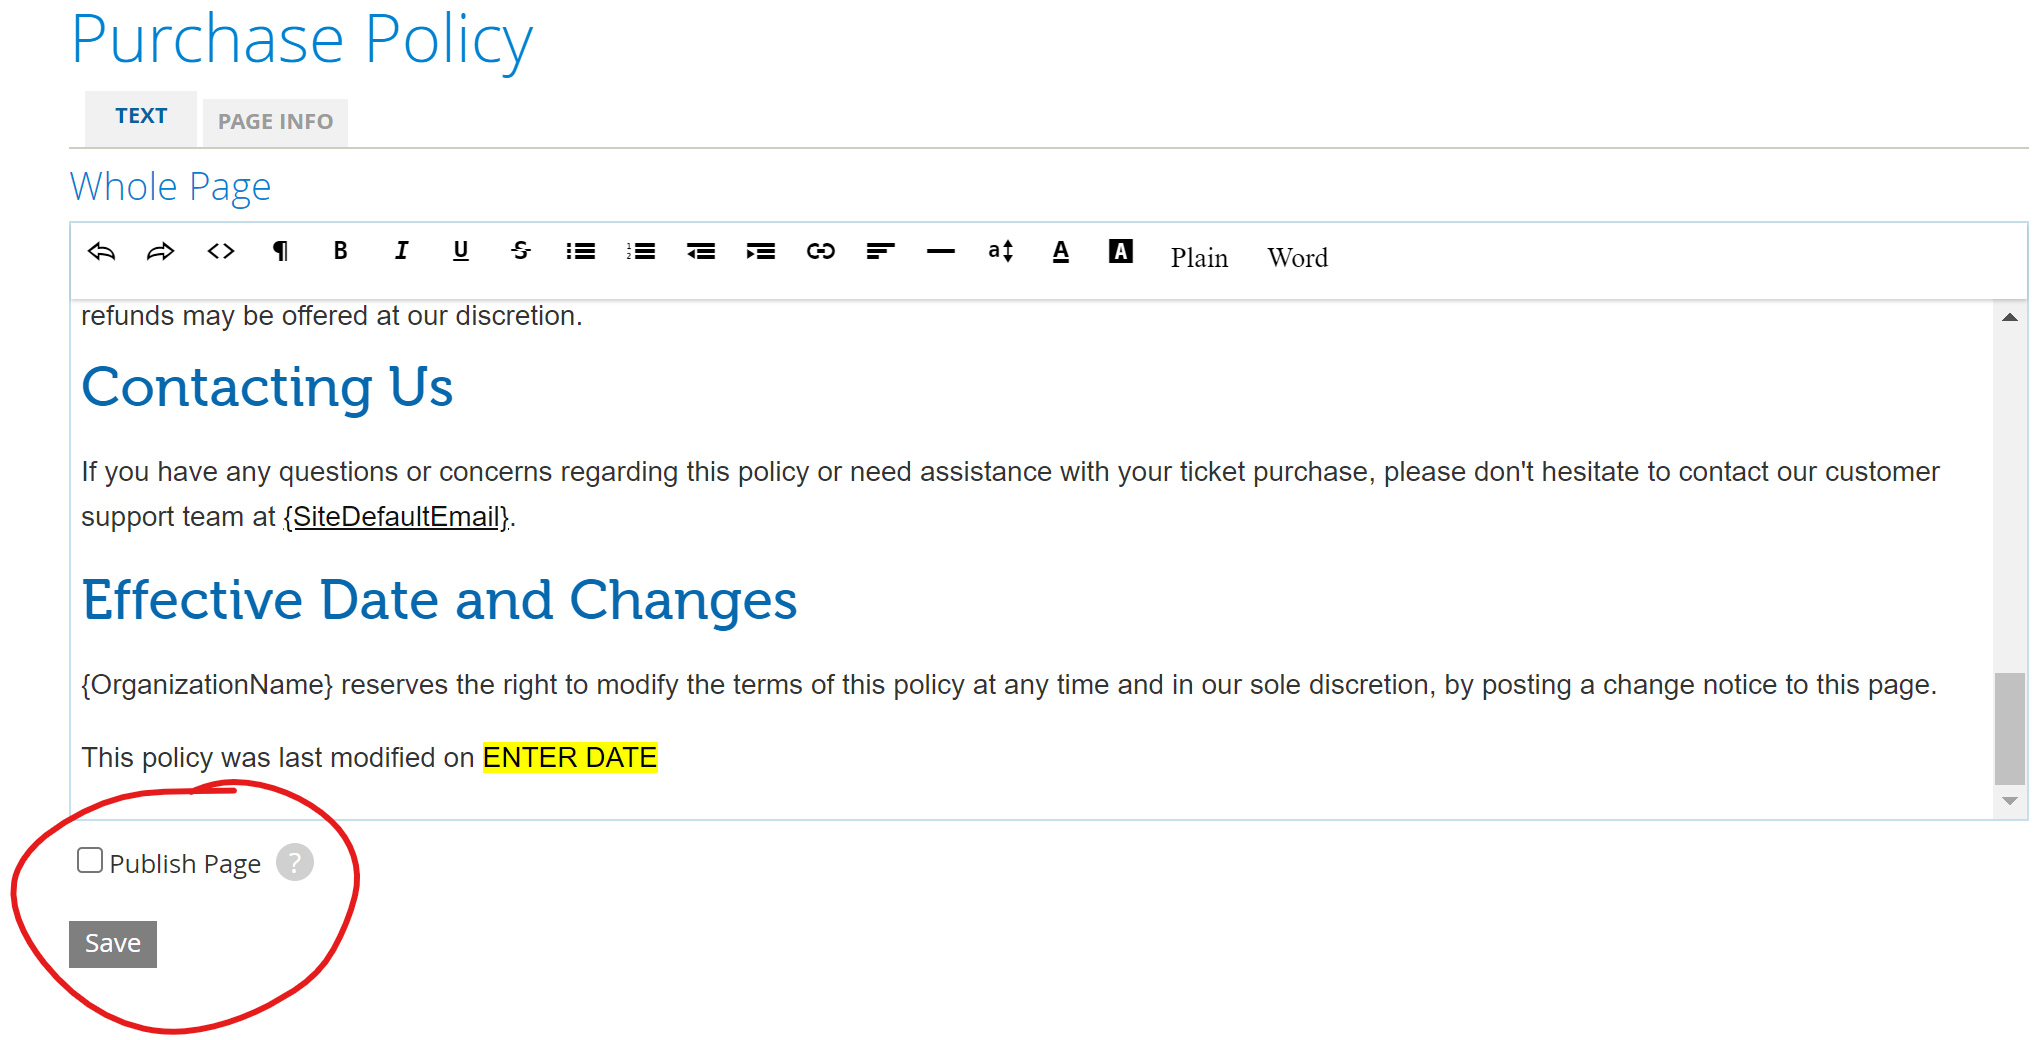

Note: Be sure to update the DATE on the bottom of the Policy before publishing.
Customer View
When enabled and required for your customers, they will see this checkbox at the bottom of the review page before they submit their order. Not only will your customers have to check the box, but this will open the policy in a popup that they have to scroll through to ready in order to accept and proceed to Complete Purchase.

The name of this policy can be changed to suit your need on the Edit Content page by switching to the Page Info tab.
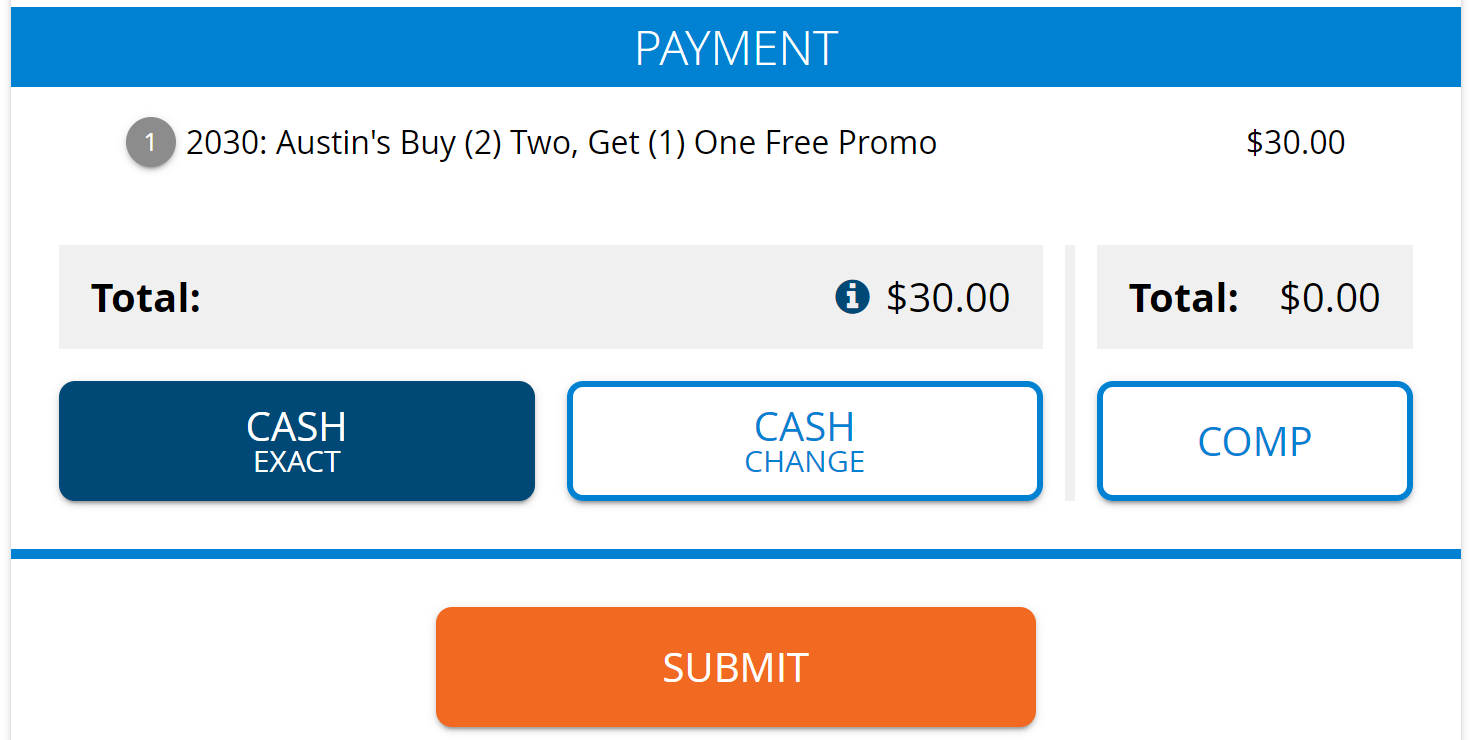
Cash/Card only Locations
Spark Location: Commerce > SaffireTix > Payment Types
We've expanded the customization to our standard Payment Types so that you can now have a true Cashless Web Box Office location.
You can now edit the standard payment types of Card and Cash so they don't appear in certain Web Box Office Locations.

Note: This does not affect the SaffireTix App or Kiosk Locations.
Kiosk Configuration Workflow
This new process is designed primarily for RENTED equipment. We have created a new login for kiosks that you receive from us. These will always have a shortcut on the desktop that will direct you to saffire.com/kiosk/configuration
From this new page, you will be able to enter your Event URL, Email/Password (or PIN), and a Save Until date. This Save Until is new and is designed to have a cookie on your device to remember this event url and credentials through the date you select. We recommend you set this date to at least one day past the final date of your event run.

If for some reason, you set this date incorrectly or you receive a kiosk from a different event, you will be given a countdown of 10 seconds that you can override the redirect to the saved event credentials. By clicking Exit on this countdown, you'll be able to reset the Event URL, Email/Password (or PIN), and Save Until date.

In addition to this new workflow for configuring your kiosk on rented equipment, we also added your Organization Logo to the top center of the kiosk so that you will have a clear visual indication that your kiosk is logged in to the correct site. If you see something that is not your site logo, then you will want to log out and click the Exit button to reset the login credentials.

If you have a different logo that you would like displayed on your kiosks, please send us the image so that we can make this switch out for you.
Other Improvements
- New Discount by Price Type
- You can set a discount to only apply to set Price Types across full Categories/sub categories. This allows you to set a discount for example %5 off Adult on all products, and not have to add each individual product to the list (while still preventing your other price types from being discounted)
- Discount Percentage off Fees
- When discounting by percentage (%), you can now apply that same discount percentage to your fees. You will see a new checkbox labeled "Apply discount to Product Fees". If this is set on a Discount Off Products, then this percentage off fees will only apply to those products listed. Not all fees on the order.
- Sales Report Export: We've separated out the column for redemption quantity and percentage so that you can filter and sort with more granularity within Excel.
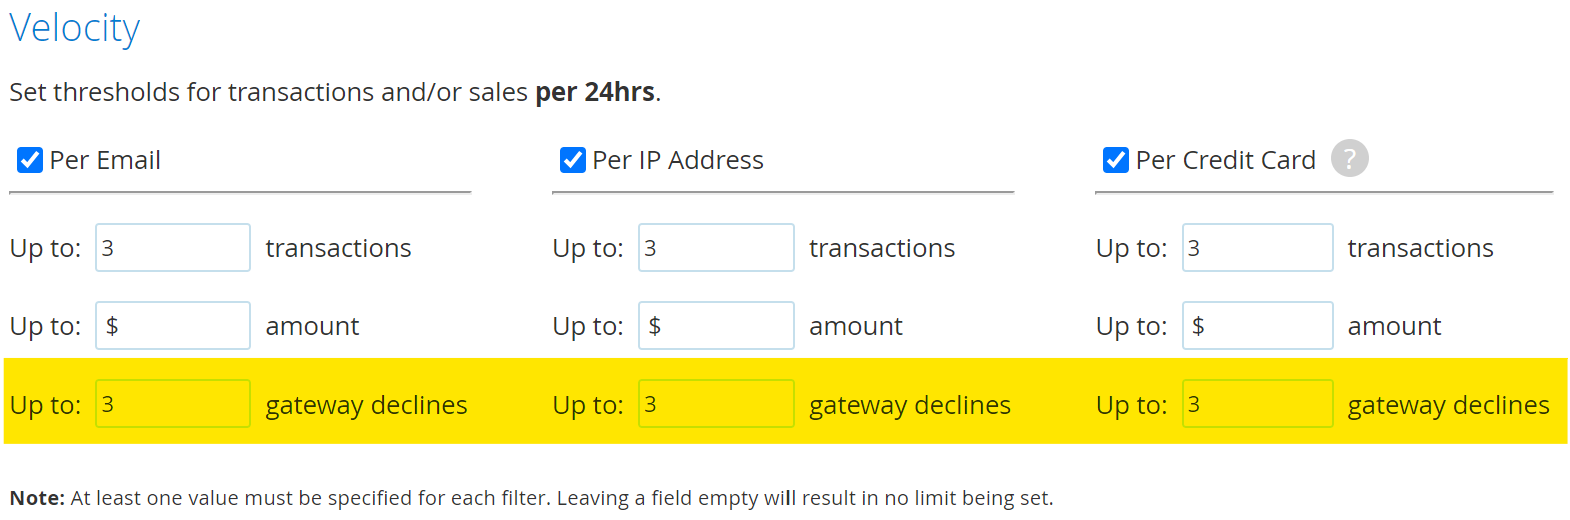
- Fraud Production: New Gateway Declines Velocity Filter
- We've added a new filter called "gateway declines" and set the default to 3 before blocking transactions during a 24 hour time period. What this is meant to do is that if a customer passes all other Fraud measures in place but then fails multiple times at the gateway (i.e. CVV mismatch, AVS problem, etc.) then we will then block transactions at the Saffire Fraud level.
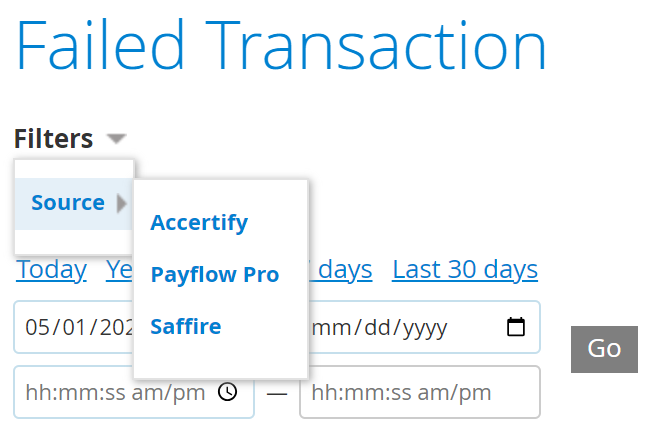
- Failed Transactions Source Filter
- We've implemented a filter to this report so that you can now see only transactions that have failed for specific reasons, whether that be:
- Saffire (Fraud Tools)
- Payment Gateway
- You can still also set the date range to this report to only see failed transactions during a specific timeframe.
- We've implemented a filter to this report so that you can now see only transactions that have failed for specific reasons, whether that be: