
Items module
IN THIS ARTICLE

The Items module allows you to add For Sale products or Not For Sale information to any dynamic, event, or business page.
- For Sale items might include merchandise, tickets, service orders, or registration fees.
- Not For Sale items may be event dates, participation details, store/office hours, etc... yet this information is often better presented using Text/Gallery modules due to the character limitation of the Items Module.
- Only one instance of the Items Module can appear on each Event or Business page, and it's included in those pages by default. This restriction is due to the Title Module (required on every page) which automatically displays a "Buy" button when For Sale items are added. Clicking the 'Buy' button jumps the page to the position of the Items Module so that users can find everything being sold.
- You can add as many Items Modules as needed on Dynamic pages. The Title Module on these pages do not include Buy buttons.
- You can add as many items as you wish within an Items Module. You might have multiple dates for a recurring event, or multiple types of products, such as General Admission, Reserved, VIP or Parking options for an event.
- Site visitors can save event dates to their Outlook and/or Google calendars.
Add Item
- If you're on a Dynamic page, you'll need to add an Items Module.
- If you're on a Event or Business page the module will already be in place (usually at the bottom of the page).
- Click on the module to switch to Edit mode.
A few things to be familiar with before moving ahead...
- You can add a Heading, but it's not required.
Headings always appear as a 'Header 2' font size. - Module PowerDots (menu)
- Item PowerDots (menu)
- an active Item
- The 4-way arrow is used to drag & drop items for reordering them within the module (when you have more than one)

Ready? Go!
- Click Add Item and choose the appropriate option.

For Sale
- This option allows you to add an existing product or Add a New Product.
- You can add a date if the product doesn't already have one attached.
- Be sure to click the Select button after finding or adding the product.
- Then you can Save & Close or Save & Add Another product.

Not For Sale
- This option just requires a Name and Description
- You have the option to add a Cost Description for items sold offline, an image, a form, and a date
- Then you can Save & Close or Save & Add Another product.

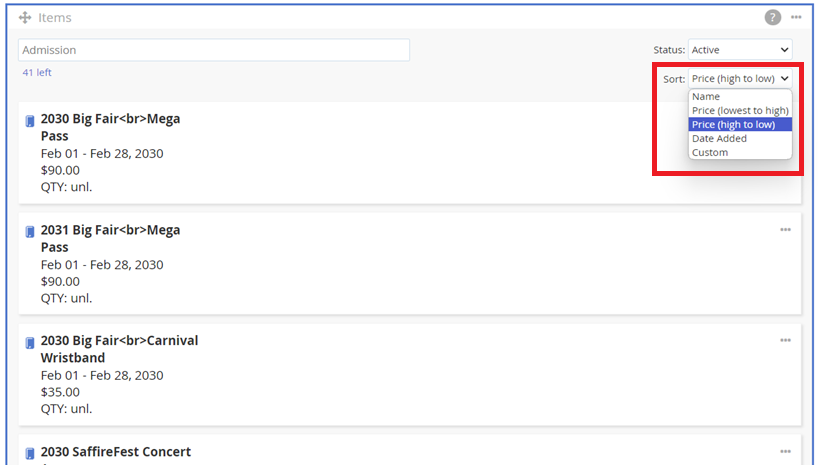
Sorting Options
Here are the options you can select from:
- Name: items are sorted first by numbers, then letters, and finally empty names.
- Price (lowest to high)
- Price (high to low)
- Date Added
- Custom: this is the default preset option that lets you sort the items as you wish.
Use the 'up/down' icon to the left of your items to drag & drop them in the order you choose. This works on dynamic pages with an Items module, and on business/event pages in the Items tab.
PowerDots
Module PowerDots
- Edit / Display opens or closes the module, depending on which mode it's currently in
- Hide will keep the module from being displayed on the live page. You'll see it change to lighter gray in Spark. This is useful for quickly removing the module from public display.
- Schedule It allows you to choose when the module will appear and/or disappear from public display.
 Item PowerDots
 Item PowerDots
- Edit allows you to modify the details of a particular item. You can also open the Item for editing by clicking anywhere on the item itself.
- Deactivate switches off customer access to an item
- Copy Item allows you to clone an item, then modify the time. Use this for events with multiple occurrences on the same day, e.g., a juggling performance at 1pm, 4pm and 7pm, all with the same date.

- More Dates allows you to clone an existing item and assign unique dates & times to the duplicates.
- You can edit each of the duplicates to customize the times, but if an item requires a unique price or description you'll need to attach it to a different product.
- If a specific product has a date assigned to it, More Dates will not be an option for the item.
- After selecting your dates, be sure to scroll down below the calendars and click CREATE ITEMS.

